Last Updated on 29/01/2026 by Eran Feit
If you’ve ever tried to enlarge a photo, you know how quickly it becomes blurry and pixelated. A free image upscaler solves this by using AI super resolution to make your images and videos sharper, clearer, and higher in resolution—without losing quality. In this guide, I’ll show you exactly how a free image upscaler works, compare the best online options, and explain how AI tools can improve your visuals in just a few clicks.
This tutorial dives into CodeFormer, a state-of-the-art model focused on face restoration under blind degradation. You’ll get a hands-on installation walkthrough, see how to upscale both images and videos, and even colorize old black-and-white photos. But more than just commands, you’ll also get insight into how the model works, how to tweak its parameters, and when it might fail.
Best Free Image Upscaler Tools Compared
Editor’s Pick:CodeFormer (open-source) — exceptional face restoration + upscaling. For portraits and old photos, pair CodeFormer with Real-ESRGAN to recover facial details while increasing resolution. If your goal is a free image upscaler that shines on faces, start here.
If you are searching for the best free image upscaler, the options below cover quick browser tools and powerful open-source projects. Choose based on speed, watermark policy, and whether you need photo/face restoration.
| Tool | Free Plan Limits | Watermark | Best For |
|---|---|---|---|
| CodeFormer (Recommended) | Unlimited (local install or Colab); often paired with Real-ESRGAN | No watermark | Face restoration + upscaling; portraits, family archives, low-quality selfies |
| Upscale.media | 2× or 4× upscaling, generous free use | No watermark | Fast, simple browser use without sign-up |
| BigJPG | Free up to ~3000px, daily quota | No watermark | Illustrations, anime, clean line art |
| Let’s Enhance | ~10 free credits after sign-up | No watermark | High-quality photo detail recovery via web |
| ESRGAN (Open-Source) | Unlimited (local install or Colab) | No watermark | General-purpose AI upscaling; full offline control |
For most portrait workflows, CodeFormer provides the best balance of restoration and sharpness. If you need a quick browser-based free image upscaler, Upscale.media is the easiest starting point. For maximum control or batch processing, ESRGAN/Real-ESRGAN on your machine is the most flexible path.
All these free image upscaler options beat traditional resizing. For everyday browser use, Upscale.media is quick. For offline or advanced control, ESRGAN is a strong base model. When working with portraits or historical family photos, CodeFormer (often paired with Real-ESRGAN) excels at restoring facial details while upscaling.
Why Choose a Free Image Upscaler Instead of Paid Software
Many people wonder if a free image upscaler can deliver the same results as expensive professional software. The truth is that AI super resolution technology has advanced so much that free tools now compete closely with premium solutions in most everyday cases.
- Cost savings: Paid photo editors often charge monthly fees or require a one-time purchase. A free image upscaler gives you sharp, high-resolution images without spending money.
- No installation: Most free upscalers run directly in your browser. This means you can upscale images online instantly without downloading heavy software.
- Quick results: AI-powered free image upscalers process photos and videos in seconds, making them ideal for quick projects or social media content.
- High quality for casual use: If you only need to enlarge personal photos, artwork, or blog visuals, a free tool is usually more than enough.
- Testing before upgrading: Using a free version allows you to test the results and workflow before deciding if a premium tool is worth it for your professional needs.
Paid solutions may offer advanced batch processing, larger maximum file sizes, or integration with professional editing workflows. However, for most individuals and creators, a free image upscaler is the smarter first choice, delivering excellent results without cost.
What You’ll Learn:
The tutorial is divided into four parts:
Part 1: Setting up the Environment.
Part 2: Image Super-Resolution
Part 3: Video Super-Resolution
Part 4: Bonus – Colorizing Old and Gray Images
You can download the Instructions steps for this video here : https://eranfeit.lemonsqueezy.com/buy/7a37a437-487a-4f29-8f0c-7158d66940b5
or here : https://ko-fi.com/s/0cbc853606
Check out our tutorial here : https://www.youtube.com/watch?v=sjhZjsvfN_o
You can find more tutorials, and join my newsletter here : https://eranfeit.net/blog
You can download the Instructions steps for this video here : https://ko-fi.com/s/0cbc853606
Part 1 : Free Image Upscaler Installation
We’ll set up a Python environment with necessary dependencies to run CodeFormer and related utilities. Correct versions ensure compatibility — mismatched CUDA or PyTorch can lead to cryptic errors
CodeFormer is built on top of BasicSR and related toolkits, so setting up environment properly matters.
# Create a Conda enviroment conda create --name Codeformer3 python=3.11 conda activate Codeformer3 # Clone the CodeFormer git clone https://github.com/sczhou/CodeFormer.git cd CodeFormer # install Pytorch 2.5.0 # # Find your cuda version : ( I am using Cuda 12.4) nvcc --version # Look for the command of Pytorch for your Cuda version . # for Cuda 12.4 : conda install pytorch==2.5.0 torchvision==0.20.0 torchaudio==2.5.0 pytorch-cuda=12.4 -c pytorch -c nvidia You can download the Instructions steps for this video here : https://ko-fi.com/s/0cbc853606
Part 2 : More Python libraries Installations
Now we install additional dependencies required by CodeFormer and its utilities.
addictandfuturehelp in configuration and compatibility.lmdbenables fast dataset storage access.opencv-pythonis used for image I/O and transformations.requests,scikit-image,tqdmsupport helper scripts.lpipsis used for perceptual similarity metrics.
pip install addict==2.4.0 pip install future==1.0.0 pip install lmdb==1.6.2 pip install opencv-python==4.11.0.86 pip install requests==2.32.3 pip install scikit-image==0.25.2 pip install tb-nightly==2.20.0a20250602 pip install tqdm==4.67.1 pip install yapf==0.43.0 pip install lpips==0.1.4You can download the Instructions steps for this video here : https://ko-fi.com/s/0cbc853606
Part 3: Setup, dlib, pretrained models, face alignment script
Next, we need to fetch pretrained weights. CodeFormer depends on several submodules:
- facelib: for face detection / face component priors
- dlib: landmark model used in alignment
- CodeFormer network weights
python basicsr/setup.py develop conda install -c conda-forge dlib python scripts/download_pretrained_models.py facelib python scripts/download_pretrained_models.py dlib python scripts/download_pretrained_models.py CodeFormerThese models are needed for face cropping, alignment, and restoration. Without them, inference will fail or produce subpar results.
You can download the Instructions steps for this video here : https://ko-fi.com/s/0cbc853606
part 6: Bug fix in Python script
You should replace this script , since the original repo has a bug
copy the file “crop_align_face2.py” to scripts folder from this link : https://ko-fi.com/s/0cbc853606
Part 7 : let the magic happen
Part 7: Choosing and Preparing Your Test Images
When experimenting with super-resolution and face restoration, it’s important to start with a diverse set of test images. The quality and type of input images you use will heavily influence how you judge the model’s performance.
A few tips when selecting your test images:
- Low-resolution or blurry photos: These are perfect for testing, as they highlight the strengths of CodeFormer in restoring missing details.
- Compressed images (e.g., JPEG artifacts): Compression noise is common online, and testing with these helps evaluate robustness.
- Faces under different conditions: Try portraits with different lighting, angles, and expressions. CodeFormer is particularly powerful at handling face restoration.
- Old or historical images: Black-and-white or aged photographs can reveal how well the model restores details and prepares images for later colorization.
- Challenging backgrounds: Include images with both faces and detailed environments so you can see how CodeFormer works together with the background upsampler (e.g., Real-ESRGAN).
You are welcome to use my test images

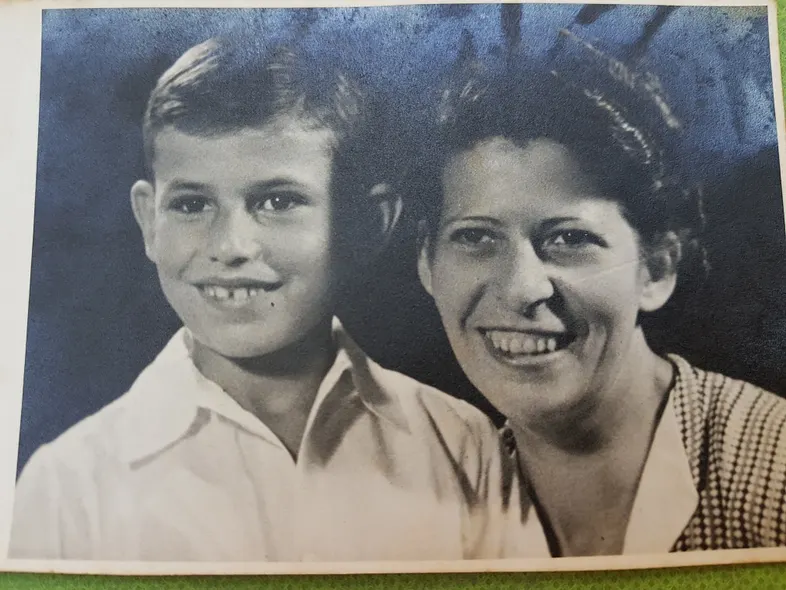
You can download the images here : https://ko-fi.com/s/0cbc853606
Part 8: Cropping and Aligning Faces for Better Results
While CodeFormer can work directly on whole images, aligned face crops often produce sharper and more natural restorations. The reason is simple: the model has been trained on standardized face inputs — consistent orientation, centered framing, and similar scale. Feeding it aligned faces helps it recognize facial features more reliably.
To align faces, CodeFormer provides helper scripts that use facial landmarks (eyes, nose, mouth corners) to crop and rotate faces into a canonical position. Here’s how you can use it:
python scripts/crop_align_face2.py -i [input folder] -o [output folder]--inputspecifies the folder containing your raw test images.--outputdefines the folder where the aligned and cropped faces will be saved.
After running this, you’ll have a set of images where faces are isolated and normalized. These can be directly passed into the restoration model with the --has_aligned flag, which tells CodeFormer that you’ve already prepared the faces.
Example workflow:
- Start with a low-resolution portrait in
inputs/. - Run the alignment script to generate a clean face crop in
inputs_aligned/. - Use this aligned crop with CodeFormer to restore details and then optionally blend it back into the full image.
Why this matters:
- Misaligned or rotated faces can confuse the model, leading to warped or inconsistent features.
- Aligned crops ensure consistent enhancement across a dataset, especially if you’re processing multiple portraits.
- For videos, alignment helps reduce jitter from frame to frame.
If you compare the results side by side, you’ll often notice sharper eyes, cleaner skin textures, and more faithful facial proportions when alignment is used.
Here is a the example command :
python scripts/crop_align_face2.py -i inputs/whole_imgs -o inputs/cropped_facesYou can download the Instructions steps for this video here : https://ko-fi.com/s/0cbc853606
Result :
[1/9] Processing: 00.jpg Number of faces detected: 4 Only keep the largest. [2/9] Processing: 01.jpg Number of faces detected: 4 Only keep the largest. [3/9] Processing: 02.png Number of faces detected: 4 Only keep the largest. [4/9] Processing: 03.jpg Number of faces detected: 1 Only keep the largest. [5/9] Processing: 04.jpg Number of faces detected: 1 Only keep the largest. [6/9] Processing: 05.jpg Number of faces detected: 1 Only keep the largest. [7/9] Processing: 06.png Number of faces detected: 2 Only keep the largest. [8/9] Processing: 2017-11-03 12.39.38.jpg Number of faces detected: 2 Only keep the largest. [9/9] Processing: low_res_image.jpg Number of faces detected: 1 Only keep the largest.Part 9: Face Restoration & Whole Image Enhancement
- what
wdoes (fidelity weight): how it affects output (tradeoff between sticking to input vs aggressive change). - Explain flags:
--has_alignedis for pre-aligned face crops (skip face/background fusion)--bg_upsamplerchooses which SR model for non-face areas--face_upsampleoptionally upsamples the restored face region (often with ESRGAN)
- Provide a table summarizing recommended values and tradeoffs:
| Parameter / Flag | Recommended Value(s) | Behavior / Tradeoff |
|---|---|---|
-w (fidelity weight) | 0.5 – 0.8 | Lower → more aggressive changes; higher → more conservative |
--bg_upsampler | realesrgan | Better non-face region reconstruction |
--face_upsample | enabled/disabled | Upsample face region further, may improve sharpness but risk artifacts |
--has_aligned | set when inputs are already cropped/aligned | Skip fusion logic, speed up |
# For cropped and aligned faces (512x512) python inference_codeformer.py -w 0.5 --has_aligned --input_path [image folder]|[image path] 🖼️ Whole Image Enhancement # For whole image # Add '--bg_upsampler realesrgan' to enhance the background regions with Real-ESRGAN # Add '--face_upsample' to further upsample restorated face with Real-ESRGAN # Add -w --fidelity_weight # sample : python inference_codeformer.py -w 0.7 --input_path inputs/whole_imgs # run this command for upscale images : ##################################### python inference_codeformer.py --input_path inputs/whole_imgs --output_path results -w 0.7 --bg_upsampler realesrgan --face_upsampleYou can download the Instructions steps for this video here : https://ko-fi.com/s/0cbc853606
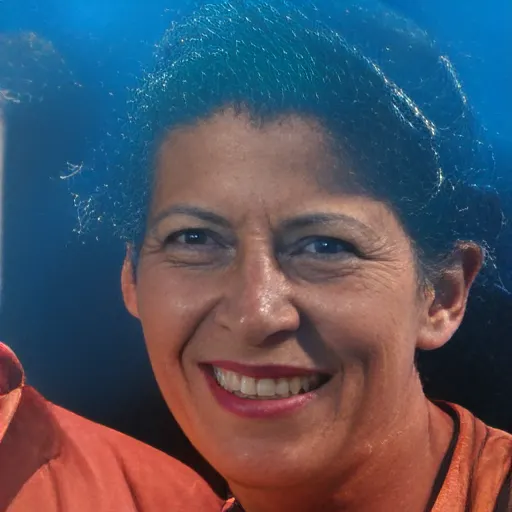
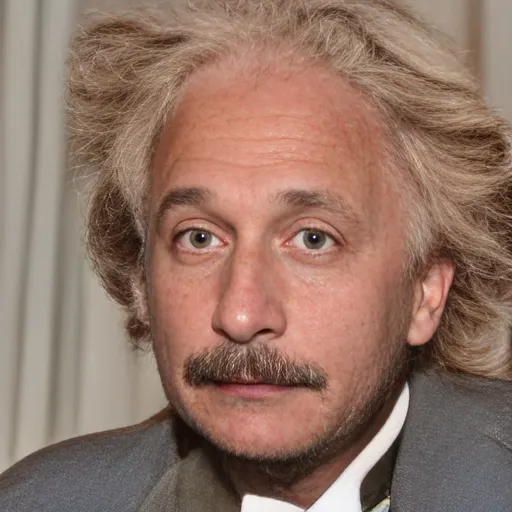
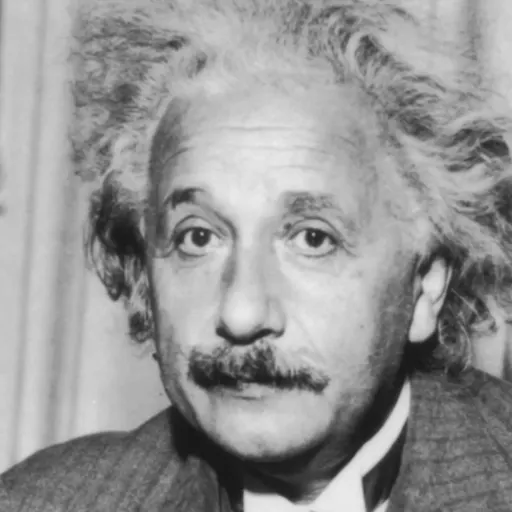
Here is the amazing result :
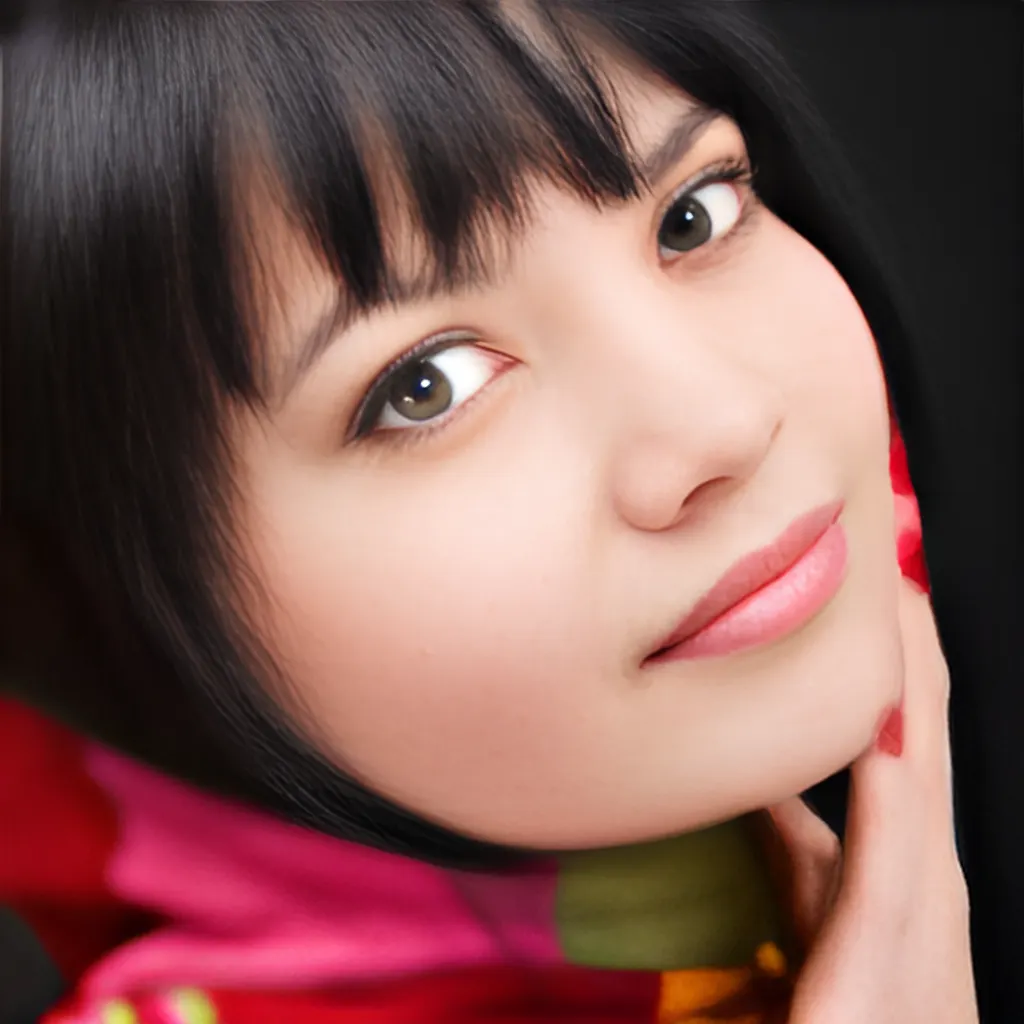
Part 10: Video Enhancement
Working with video files is very similar to enhancing images — the main difference is that instead of a single picture, we need to process hundreds or even thousands of frames. CodeFormer can handle video input directly, which saves you from manually extracting and reassembling frames.
Enhancing videos with CodeFormer follows this flow:
- Frame-by-frame processing – each frame is treated as an image, where CodeFormer detects faces, restores them, and blends them back into the scene.
- Background upsampling – areas outside the face can be enhanced with a background upsampler such as Real-ESRGAN.
- Video reassembly – the processed frames are combined back into a final output video.
You can download the retro video from here : https://ko-fi.com/s/0cbc853606

Here’s a sample command to run video enhancement:
Sample command : python inference_codeformer.py --input_path inputs/video.mp4 \ --bg_upsampler realesrgan --face_upsample -w 0.7 --input_pathpoints to your video file.--bg_upsampler realesrganensures that non-face areas (like hair, background, and clothes) are sharpened too.--face_upsampleimproves the resolution of restored faces even further.-w 0.7gives a good balance between staying faithful to the original and generating sharp details.
Things to keep in mind:
- Because each frame is processed independently, you may notice slight flickering or changes between frames. This is a normal limitation of frame-based super-resolution.
- The longer the video, the higher the GPU memory and processing time required. For large files, consider breaking the video into shorter clips.
- Always experiment with different fidelity weights (
-w) to find the sweet spot between detail and realism.
When done correctly, CodeFormer can turn a blurry, low-quality clip into a much sharper and more watchable video — especially when faces are the main subject.
# please install ffmpeg first : conda install -c conda-forge ffmpeg pip install ffmpeg # Copy the Startrek.avi to a new subfolder named "video" into the "codeformer" main folder # Video file should end with '.mp4'|'.mov'|'.avi' python inference_codeformer.py --bg_upsampler realesrgan --face_upsample -w 1.0 --input_path [video path] # sample command python inference_codeformer.py --bg_upsampler realesrgan --face_upsample -w 1.0 --input_path video/Startrek.aviYou can download the Instructions steps for this video here : https://ko-fi.com/s/0cbc853606
Face Colorization of Old Photos
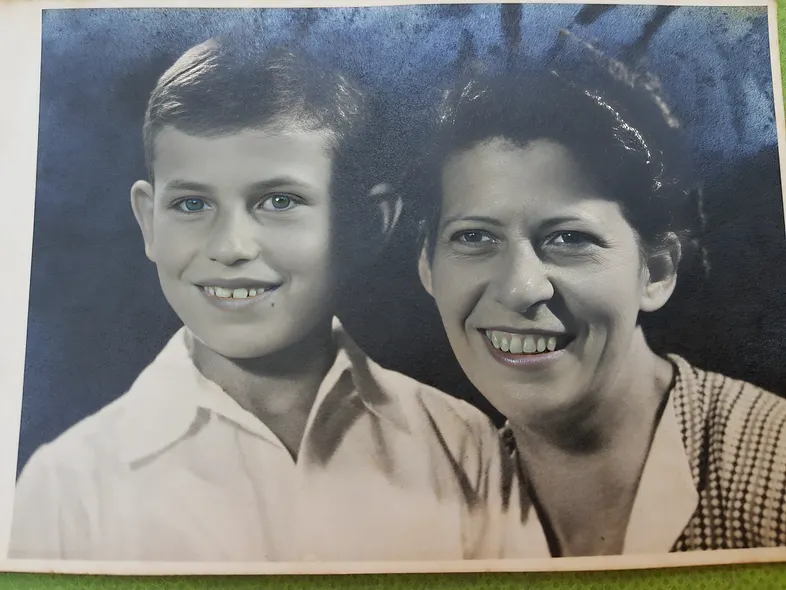
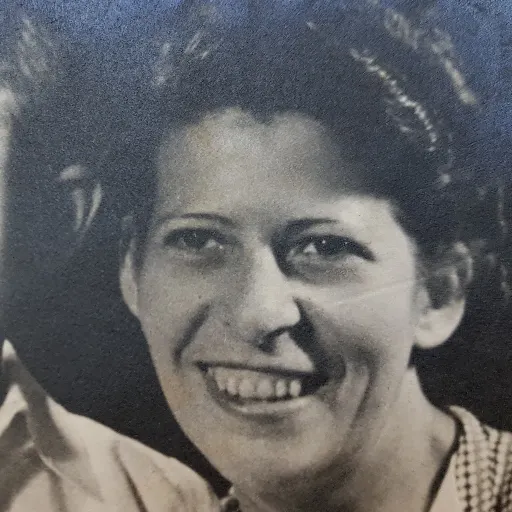
Another powerful feature you can try is face colorization. This is especially useful for breathing life into black-and-white photos, whether they’re old family portraits or historical images. CodeFormer provides a built-in script that predicts natural skin tones, hair color, and background hues from grayscale input.
Start by making sure your input images are in grayscale. Then run the following command:
python inference_colorization.py --input inputs/bw_images --output results/colorized --inputis the folder with your black-and-white images.--outputis where the colorized results will be saved.
The model will generate realistic color versions of the photos.
Why this matters:
- Old photographs often lose impact due to lack of color — adding natural tones makes them feel alive and more relatable.
- Colorization combined with super-resolution gives you both detail and vividness, perfect for restoration projects.
- While the model does a great job, keep in mind that the chosen colors are predictions — they may not always match historical reality. You can adjust the results later in Photoshop or similar tools if accuracy is important.
This step is optional, but it’s a fun and impressive way to demonstrate the full potential of AI-based restoration.
Here is the full script :
3 steps : #step 1 :crop your gray image copy your image to whole_imgs folder # run the crop command : !!!! python scripts/crop_align_face.py -i [input folder] -o [output folder] python scripts/crop_align_face.py -i inputs/whole_imgs # it will generate a faces images in the "inputs/cropped" Option 2 : If you run with no paramters the whole_imgs folder will be the input and the cropped folder will be the output python scripts/crop_align_face.py # step 2 : copy the face gray image to "inputs\gray_faces" folder # Step 3 : run the color process For cropped and aligned faces (512x512) # Colorize black and white or faded photo python inference_colorization.py --input_path [image folder]|[image path] # if it is in the defalut gray folder , You can run : python inference_colorization.py Now , go to "results\gray_faces" folder and you can find your color imageYou can download the Instructions steps for this video here : https://ko-fi.com/s/0cbc853606
FAQ
What is CodeFormer and how is it different from other super-resolution models?
CodeFormer is an AI model designed for face restoration under blind degradation. Unlike simple upscalers, it uses a codebook and transformer-based prediction to reconstruct missing details, making faces look more natural and realistic.
What does the fidelity weight -w parameter do?
The -w parameter balances faithfulness and enhancement. Lower values create sharper details but may alter identity, while higher values stay closer to the original with softer improvements.
Do I need to align faces before using CodeFormer?
Not always. CodeFormer can detect faces in whole images, but aligned crops usually give sharper and more consistent results. Use the –has_aligned flag if you already prepared aligned faces.
Can CodeFormer restore non-face areas like backgrounds?
Yes, when combined with a background upsampler like Real-ESRGAN. This ensures that both faces and the surrounding scene are enhanced together for consistent results.
How does CodeFormer handle video files?
CodeFormer processes videos frame by frame, restoring each face and then reassembling the video. This works well but can sometimes introduce slight flicker across frames.
What are the hardware requirements for CodeFormer?
A modern NVIDIA GPU with at least 6–8 GB of VRAM is recommended. CPU-only runs are possible but very slow, especially for videos or large images.
Can I use CodeFormer for colorizing black-and-white images?
Yes, CodeFormer provides a script for automatic colorization. It predicts natural skin, hair, and background tones, making old photos look vivid and modern.
Why do my results look strange or distorted sometimes?
This happens if the face is too small, blurry, or misaligned. Cropping and aligning faces or adjusting the -w parameter usually improves results.
How does CodeFormer compare to GFPGAN and Real-ESRGAN?
GFPGAN is fast for face restoration but may oversmooth. Real-ESRGAN is excellent for general upscaling. CodeFormer is stronger for faces under unknown degradations, and many users combine it with Real-ESRGAN.
Can I use CodeFormer commercially?
Yes, but you must comply with the NTU S-Lab License. Review the license carefully before using it in commercial projects or products.
Conclusion
Super-resolution (Free Image Upscaler) is more than just making an image bigger — it’s about recovering lost details, reducing artifacts, and creating visually pleasing results. With CodeFormer, you get a model designed specifically to handle the hardest part of image enhancement: faces under real-world degradations like blur, noise, and compression.
In this tutorial, we’ve walked through:
- Setting up CodeFormer and downloading pretrained models.
- Preparing and aligning test images for better accuracy.
- Running image enhancement with fidelity control parameters.
- Upscaling entire videos with background upsampling and face restoration.
- Adding life to old black-and-white photos with automatic colorization.
While CodeFormer is powerful, remember its limitations: results may vary for non-face regions, and video outputs can suffer from flicker if processed frame by frame. Still, combined with models like Real-ESRGAN for backgrounds, you can achieve professional-quality restorations with just a few commands.
If you’re restoring family archives, enhancing AI-generated images, or making old videos watchable again, CodeFormer is one of the most versatile and reliable tools available today. With a bit of experimentation, you’ll quickly discover the best settings for your projects and unlock new creative possibilities in image and video restoration.
Connect :
☕ Buy me a coffee — https://ko-fi.com/eranfeit
🖥️ Email : feitgemel@gmail.com
🤝 Fiverr : https://www.fiverr.com/s/mB3Pbb
Planning a trip and want ideas you can copy fast?
Here are three detailed guides from our travels:
• 5-Day Ireland Itinerary: Cliffs, Castles, Pubs & Wild Atlantic Views
https://eranfeit.net/unforgettable-trip-to-ireland-full-itinerary/
• My Kraków Travel Guide: Best Places to Eat, Stay & Explore
https://eranfeit.net/my-krakow-travel-guide-best-places-to-eat-stay-explore/
• Northern Greece: Athens, Meteora, Tzoumerka, Ioannina & Nafpaktos (7 Days)
https://eranfeit.net/my-amazing-trip-to-greece/
Each guide includes maps, practical tips, and family-friendly stops—so you can plan in minutes, not hours.
Enjoy,
Eran


