Last Updated on 26/08/2026 by Eran Feit
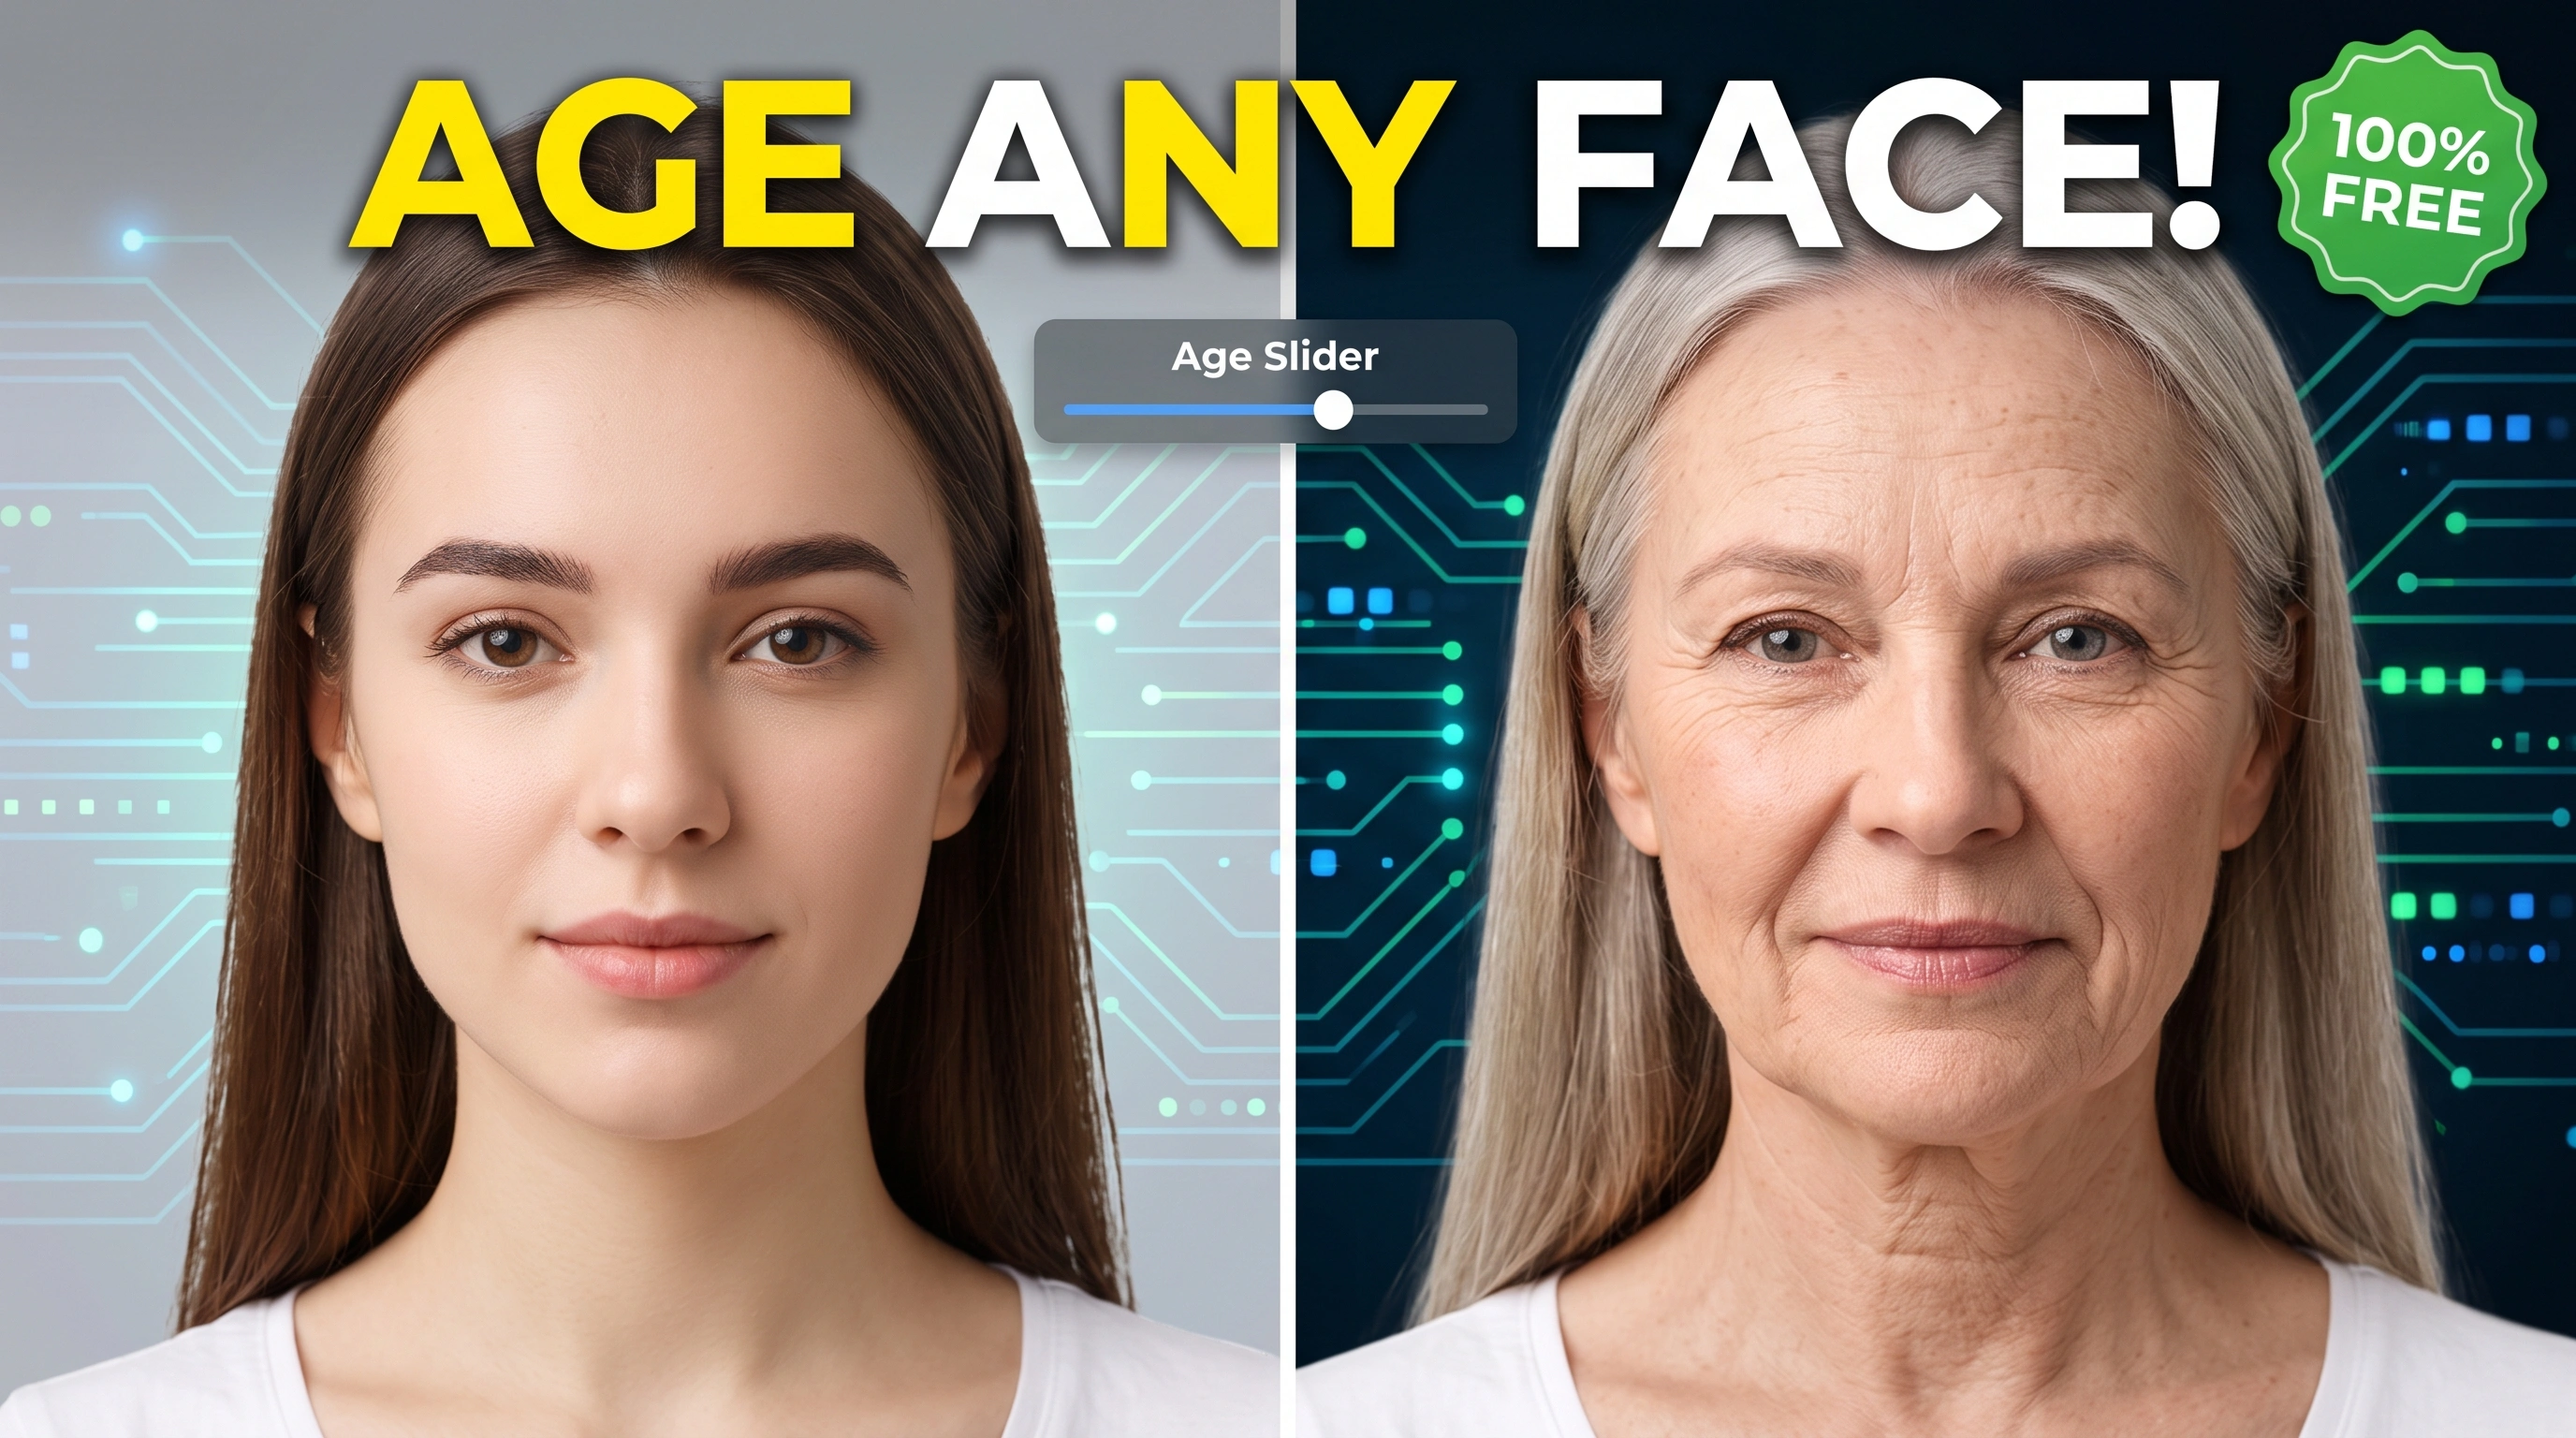
Modern generative AI has revolutionized digital portrait manipulation, but proprietary tools frequently gate realistic transformations behind expensive subscriptions or strict usage limits. This guide demonstrates how to deploy a complete ai face aging free workflow directly on personal hardware, giving you total control over high-resolution age progression and regression.
Setting up an open-source pipeline locally eliminates recurring computing fees, preserves data privacy by keeping source images offline, and removes arbitrary platform boundaries. Users gain the freedom to process unlimited high-resolution portraits, fine-tune inference parameters, and leverage local hardware acceleration to achieve studio-grade visual effects.
This tutorial provides a complete technical walkthrough starting from a clean virtual environment setup and GPU runtime configuration to launching a web-based graphical interface. Every command is presented clearly to ensure seamless dependency management, hardware compatibility, and direct execution of the aging model.
Following this step-by-step implementation enables developers, digital artists, and AI enthusiasts to transform facial attributes naturally while maintaining structural identity and lighting accuracy. The workflow transforms complex machine learning repositories into a practical, repeatable, and entirely free desktop solution.
Why Running AI Face Aging Free Locally Is a Game Changer Traditional photo manipulation requires meticulous, manual digital painting to add realistic skin folds, adjust pigment patterns, and modify hair distribution. Automated cloud services simplify this process using deep neural networks, but they rely on remote servers that charge per image and retain user data. Operating a local face-aging environment bypasses third-party dependencies, turning standard consumer graphics hardware into a dedicated generative rendering engine.
At a high level, modern neural architectures process facial features across distinct latent spaces, isolating identity landmarks from age-related attributes such as skin elasticity, volume loss, and tone changes. When modifying a portrait, the underlying model shifts semantic vectors along calibrated age trajectories. This allows the system to accurately simulate advanced aging or reverse the visual clock to a youthful state while leaving core biometric features untouched.
Executing these models locally unlocks direct hardware acceleration through dedicated compute runtimes like CUDA, TensorRT, or OpenVINO. This local execution drastically cuts down inference latency, bypasses queue times, and gives practitioners complete flexibility to integrate facial age transformation into broader visual pipelines, machine learning experiments, or custom digital applications.
How to Run AI Face Aging Free with Python 10 Building a Local Pipeline for AI Face Aging and De-Aging Why Run Generative Age Modification on Your Local Machine? Running generative age transformation locally gives you direct access to raw model parameters, eliminates cloud render queues, guarantees data privacy, and removes third-party subscription paywalls. By setting up the framework within an isolated Python environment, you obtain an offline visual effects engine capable of processing high-resolution portrait imagery with zero external API fees.
The primary objective of the code workflow is to deploy an open-source face manipulation architecture that isolates identity representations from semantic age markers. Rather than using simplistic pixel-blurring or texture-layering filters, the framework analyzes facial landmark structures and shifts the underlying latent vectors across calibrated age trajectories. This allows you to realistically age a subject forward into their senior years or de-age them backward to youth while strictly preserving bone structure, gaze, lighting conditions, and distinctive facial geometry.
To achieve smooth, real-time performance on local workstations, the installation script configures low-level hardware acceleration runtimes. It establishes dedicated CUDA and TensorRT execution bindings for NVIDIA hardware, while also providing an OpenVINO fallback path for Intel platforms. This ensures the underlying ONNX neural models execute with optimized matrix operations and dynamic memory allocation, minimizing VRAM bottlenecks during inference.
Once installed, the workflow initializes a Gradio web interface via a single terminal execution command, granting complete interactive control over the age progression sliders. The environment allows you to fine-tune progression steps, preview instantaneous facial morphing, and export studio-quality transformations directly to local disk without third-party data collection or cloud latency.
Link to the tutorial here .
Download the code for the tutorial here or here .
Link for Medium users here
Master Computer Vision
Follow my latest tutorials and AI insights on my
Personal Blog .
Beginner Complete CV Bootcamp
Foundation using PyTorch & TensorFlow.
Get Started → Interactive Deep Learning with PyTorch
Hands-on practice in an interactive environment.
Start Learning → Advanced Modern CV: GPT & OpenCV4
Vision GPT and production-ready models.
Go Advanced → How to Run AI Face Aging Free with Python 11 Setting Up an Isolated Workspace for Local AI Face Manipulation Preparing your workstation properly is the foundation of deploying a reliable ai face aging free setup on your local machine. Modern machine learning models depend on exact library versions, so using an isolated Conda environment prevents package conflicts with existing Python installations. By selecting Python 3.12, you establish a solid execution base that matches the performance updates built into recent computer vision frameworks.
Creating a dedicated project directory ensures that all model weights, configuration scripts, and temporary cache files remain organized. Cloning the official repository pulls down the complete application structure, including the core pipeline and UI components. This structured approach gives you full visibility into the source files without relying on obscured cloud black-boxes.
Working directly with the local repository grants complete ownership of your workflow and keeps source images on your storage drive. You can inspect the source code, adjust execution flags, and customize age progression pipelines to suit your hardware setup. Taking these foundational steps ensures that subsequent driver installations and runtime dependencies compile cleanly without unexpected errors.
Why Is an Isolated Conda Environment Necessary for FaceFusion? An isolated Conda virtual environment ensures that the specific Python 3.12 runtime and required C++ libraries do not clash with other machine learning frameworks or system-wide packages on your computer. This isolation guarantees reproducible builds, prevents dependency drift, and makes troubleshooting GPU runtime packages straightforward.
### 1. Create a dedicated Conda virtual environment using Python 3.12 to isolate your project dependencies. conda create -n facefusion38 python= 3.12 ### 2. Activate the newly created isolated environment to manage runtime packages properly. conda activate facefusion38 ### 3. Create a clean working directory named tutorials to store the project files. md tutorials ### 4. Navigate into your new tutorials working directory. cd tutorials ### 5. Clone the official FaceFusion source repository directly from GitHub to your machine. git clone https://github.com/facefusion/facefusion ### 6. Change your active directory to enter the cloned FaceFusion repository root. cd facefusion Summary: This first stage creates an isolated Python 3.12 virtual environment and downloads the latest official FaceFusion source repository into a structured local directory.
Configuring GPU Acceleration with CUDA, TensorRT, and OpenVINO Unlocking real-time rendering speeds for ai face aging free requires configuring low-level hardware compute runtimes. Neural models process millions of matrix parameters simultaneously, making raw CPU inference slow and resource-heavy. By binding your graphics card to specialized drivers, you offload compute tasks to dedicated parallel processing cores.
For NVIDIA users, installing CUDA 12.9 runtime alongside cuDNN enables low-latency matrix calculations directly on GPU memory. Adding TensorRT converts the underlying neural graph into an optimized execution engine tailored to your GPU architecture. This optimization lowers VRAM consumption while drastically speeding up the synthesis of high-resolution age markers.
If you are operating on Intel Arc graphics hardware, OpenVINO provides an optimized execution path. This fallback ensures you achieve high inference performance even without proprietary NVIDIA hardware. Configuring these backends properly ensures your workstation renders photorealistic portrait age transformations smoothly.
Which Hardware Acceleration Driver Should You Choose? If your computer features an NVIDIA GeForce or RTX graphics card, install CUDA and TensorRT to maximize tensor core throughput during facial inference; if your workstation runs on Intel hardware, use OpenVINO to accelerate execution across integrated or discrete Intel GPUs.
### 1. Install CUDA runtime and cuDNN libraries via Conda specifically for NVIDIA graphics cards. conda install nvidia/label/cuda-12.9.1::cuda-runtime nvidia/label/cudnn-9.10.0::cudnn ### 2. Install high-performance TensorRT acceleration packages to optimize NVIDIA GPU throughput. pip install tensorrt== 10.12 .0.36 --extra-index-url https://pypi.nvidia.com ### 3. Alternative setup: Install OpenVINO drivers via Conda if you run Intel Arc graphics cards. conda install conda-forge::openvino= 2025.3 .0 Summary: This configuration stage equips your virtual environment with specialized CUDA, TensorRT, or OpenVINO execution backends to accelerate deep learning inference on local GPU hardware.
Installing Core Dependencies and Launching the Age Modifier Interface The final step in establishing your local ai face aging free engine is installing the computer vision and UI dependencies. Packages such as ONNX Runtime, NumPy, and SciPy handle underlying tensor operations, matrix resizing, and image normalization. Headless OpenCV provides fast frame manipulation without overhead from unnecessary window managers.
The web interface is powered by Gradio, integrated with a specialized RangeSlider component for intuitive age adjustments. This interactive interface lets you slide between younger and older target ages with immediate visual feedback. Once all packages are installed, resetting the Conda environment ensures that new path variables and binary extensions link properly.
Executing the launch command initializes the local web server and automatically opens FaceFusion in your browser. From the interface, you can load any portrait, activate the Age Modifier module, and produce high-resolution aging or de-aging transformations entirely offline. This setup gives you a complete, subscription-free facial transformation pipeline running directly on your hardware.
How Does the Final Command Launch the Web Application? The execution command python facefusion.py run --open-browser initializes the internal Python backend, loads the neural weights into your active GPU runtime, and starts a local Gradio server that immediately opens in your default web browser for interactive image manipulation.
### 1. Install the specialized Gradio RangeSlider UI component for smooth parameter adjustments. pip install gradio-rangeslider== 0.0 .8 ### 2. Install the primary Gradio web application framework to build the local browser interface. pip install gradio== 5.50 .0 ### 3. Install NumPy for fast array handling and high-dimensional numeric operations. pip install numpy== 2.4 .6 ### 4. Install the core ONNX library for loading pre-trained deep learning computational graphs. pip install onnx== 1.22 .0 ### 5. Install the ONNX Runtime engine to execute cross-platform neural model inference efficiently. pip install onnxruntime== 1.28 .0 ### 6. Install headless OpenCV for high-speed image processing without display GUI bloat. pip install opencv-python-headless== 5.0 .0.93 ### 7. Install TQDM to display clean progress bars during model download and frame processing. pip install tqdm== 4.70 .0 ### 8. Install SciPy for scientific computing and advanced image matrix transformations. pip install scipy== 1.18 .0 ### 9. Deactivate your active Conda environment to reset path variables safely. conda deactivate ### 10. Reactivate your facefusion38 environment to register newly installed packages. conda activate facefusion38 ### 11. Launch the local FaceFusion web server and automatically open the application in your default browser. python facefusion.py run --open-browser Summary: This installation phase completes the setup of all computer vision libraries and launches the interactive FaceFusion web UI in your default browser.
Step-by-Step Guide: De-Aging a Portrait with FaceFusion How to Run AI Face Aging Free with Python 12
Running ai face aging free workflows locally gives you direct access to professional-grade facial transformation models without platform subscriptions or data privacy risks. Follow this step-by-step walkthrough to de-age any portrait into a youthful teenager appearance using FaceFusion 3.8.2.
Step 1: Upload the Target Image Navigate to the TARGET panel in the center of the web UI. Drag and drop your source portrait photo (e.g., Lilach_face.png) or click to browse and upload it. The image will render in the TARGET preview pane, and FaceFusion will automatically detect the primary subject under REFERENCE FACE . Step 2: Select the Processors Under the PROCESSORS section on the left sidebar:
Enable age_modifier Enable frame_enhancer(Optional but recommended) : Restores crisp skin textures, hair details, and overall resolution after the age manipulation pass. Step 3: Configure the Age Modifier Settings Under the AGE MODIFIER settings block:
AGE MODIFIER MODEL: Select franAGE MODIFIER DIRECTION: Drag the slider to the negative side (e.g., -20-30 Negative values de-age the subject to look significantly younger (child/teenager).Positive values age the subject forward into senior years. Step 4: Configure the Frame Enhancer Under the FRAME ENHANCER settings block:
FRAME ENHANCER MODEL: Select span_kendata_x4FRAME ENHANCER BLEND: Set the blend slider to around 80 Step 5: Adjust Execution & Preview the Output Verify your compute configuration under EXECUTION PROVIDERS (cpu or cuda). Set your preferred output destination path under OUTPUT PATH . Check the real-time PREVIEW pane on the right at 1024x1024 resolution to inspect the smooth transition, youthful facial contours, and preserved identity before exporting your final render. Frequently Asked Questions What is FaceFusion Age Modifier? FaceFusion Age Modifier is an open-source generative AI module that modifies the apparent age of a subject in a portrait photo while preserving core facial identity.
Is this AI face aging workflow completely free? Yes, the entire pipeline is 100% free and open-source, running locally on your hardware without recurring subscriptions or cloud fees.
Do I need an NVIDIA GPU to run this code? An NVIDIA GPU with CUDA/TensorRT provides the best performance, but Intel Arc graphics via OpenVINO and CPU fallback modes are also supported.
Why do we use Python 3.12 for this installation? Python 3.12 offers optimal execution speed and compatibility with the latest Gradio 5, ONNX Runtime, and NumPy libraries within an isolated Conda environment.
Does FaceFusion upload my personal photos to an external server? No, all inference and processing take place locally on your computer, ensuring complete data privacy.
How does the AI change age without distorting identity? The model decouples identity features from age markers, adjusting only the latent age trajectory while leaving facial structure intact.
What should I do if I encounter an ONNX Runtime execution error? Verify that your GPU drivers match the installed CUDA version, and restart your virtual environment to ensure proper binary linking.
Can I use FaceFusion to make an older person look younger? Yes, the Age Modifier tool operates bidirectionally, allowing both aging and de-aging transformations.
What image formats are supported by the local web interface? The Gradio interface supports common formats including PNG, JPG, and WebP for high-resolution processing.
How much VRAM is recommended for smooth local processing? A GPU with 6 GB to 8 GB of VRAM is recommended for fast inference using TensorRT acceleration.
Mastering Local Open-Source AI Face Progression Setting up FaceFusion locally delivers a private, cost-effective alternative to subscription-based cloud services for age progression and de-aging workflows. By configuring Python 3.12 within an isolated Conda environment and binding the pipeline to CUDA, TensorRT, or OpenVINO runtimes, you unlock real-time generative capabilities directly on personal hardware.
This open-source approach keeps your data secure while giving you granular control over latent vector parameters, skin texture synthesis, and facial identity retention. Whether you are developing computer vision applications or creating visual effects, running this workflow locally provides a flexible, production-ready foundation for your generative AI projects.
Connect : ☕ Buy me a coffee — https://ko-fi.com/eranfeit
🖥️ Email : feitgemel@gmail.com
🌐 https://eranfeit.net
🤝 Fiverr : https://www.fiverr.com/s/mB3Pbb
Enjoy,
Eran
 Skip to content