Last Updated on 28/09/2026 by Eran Feit
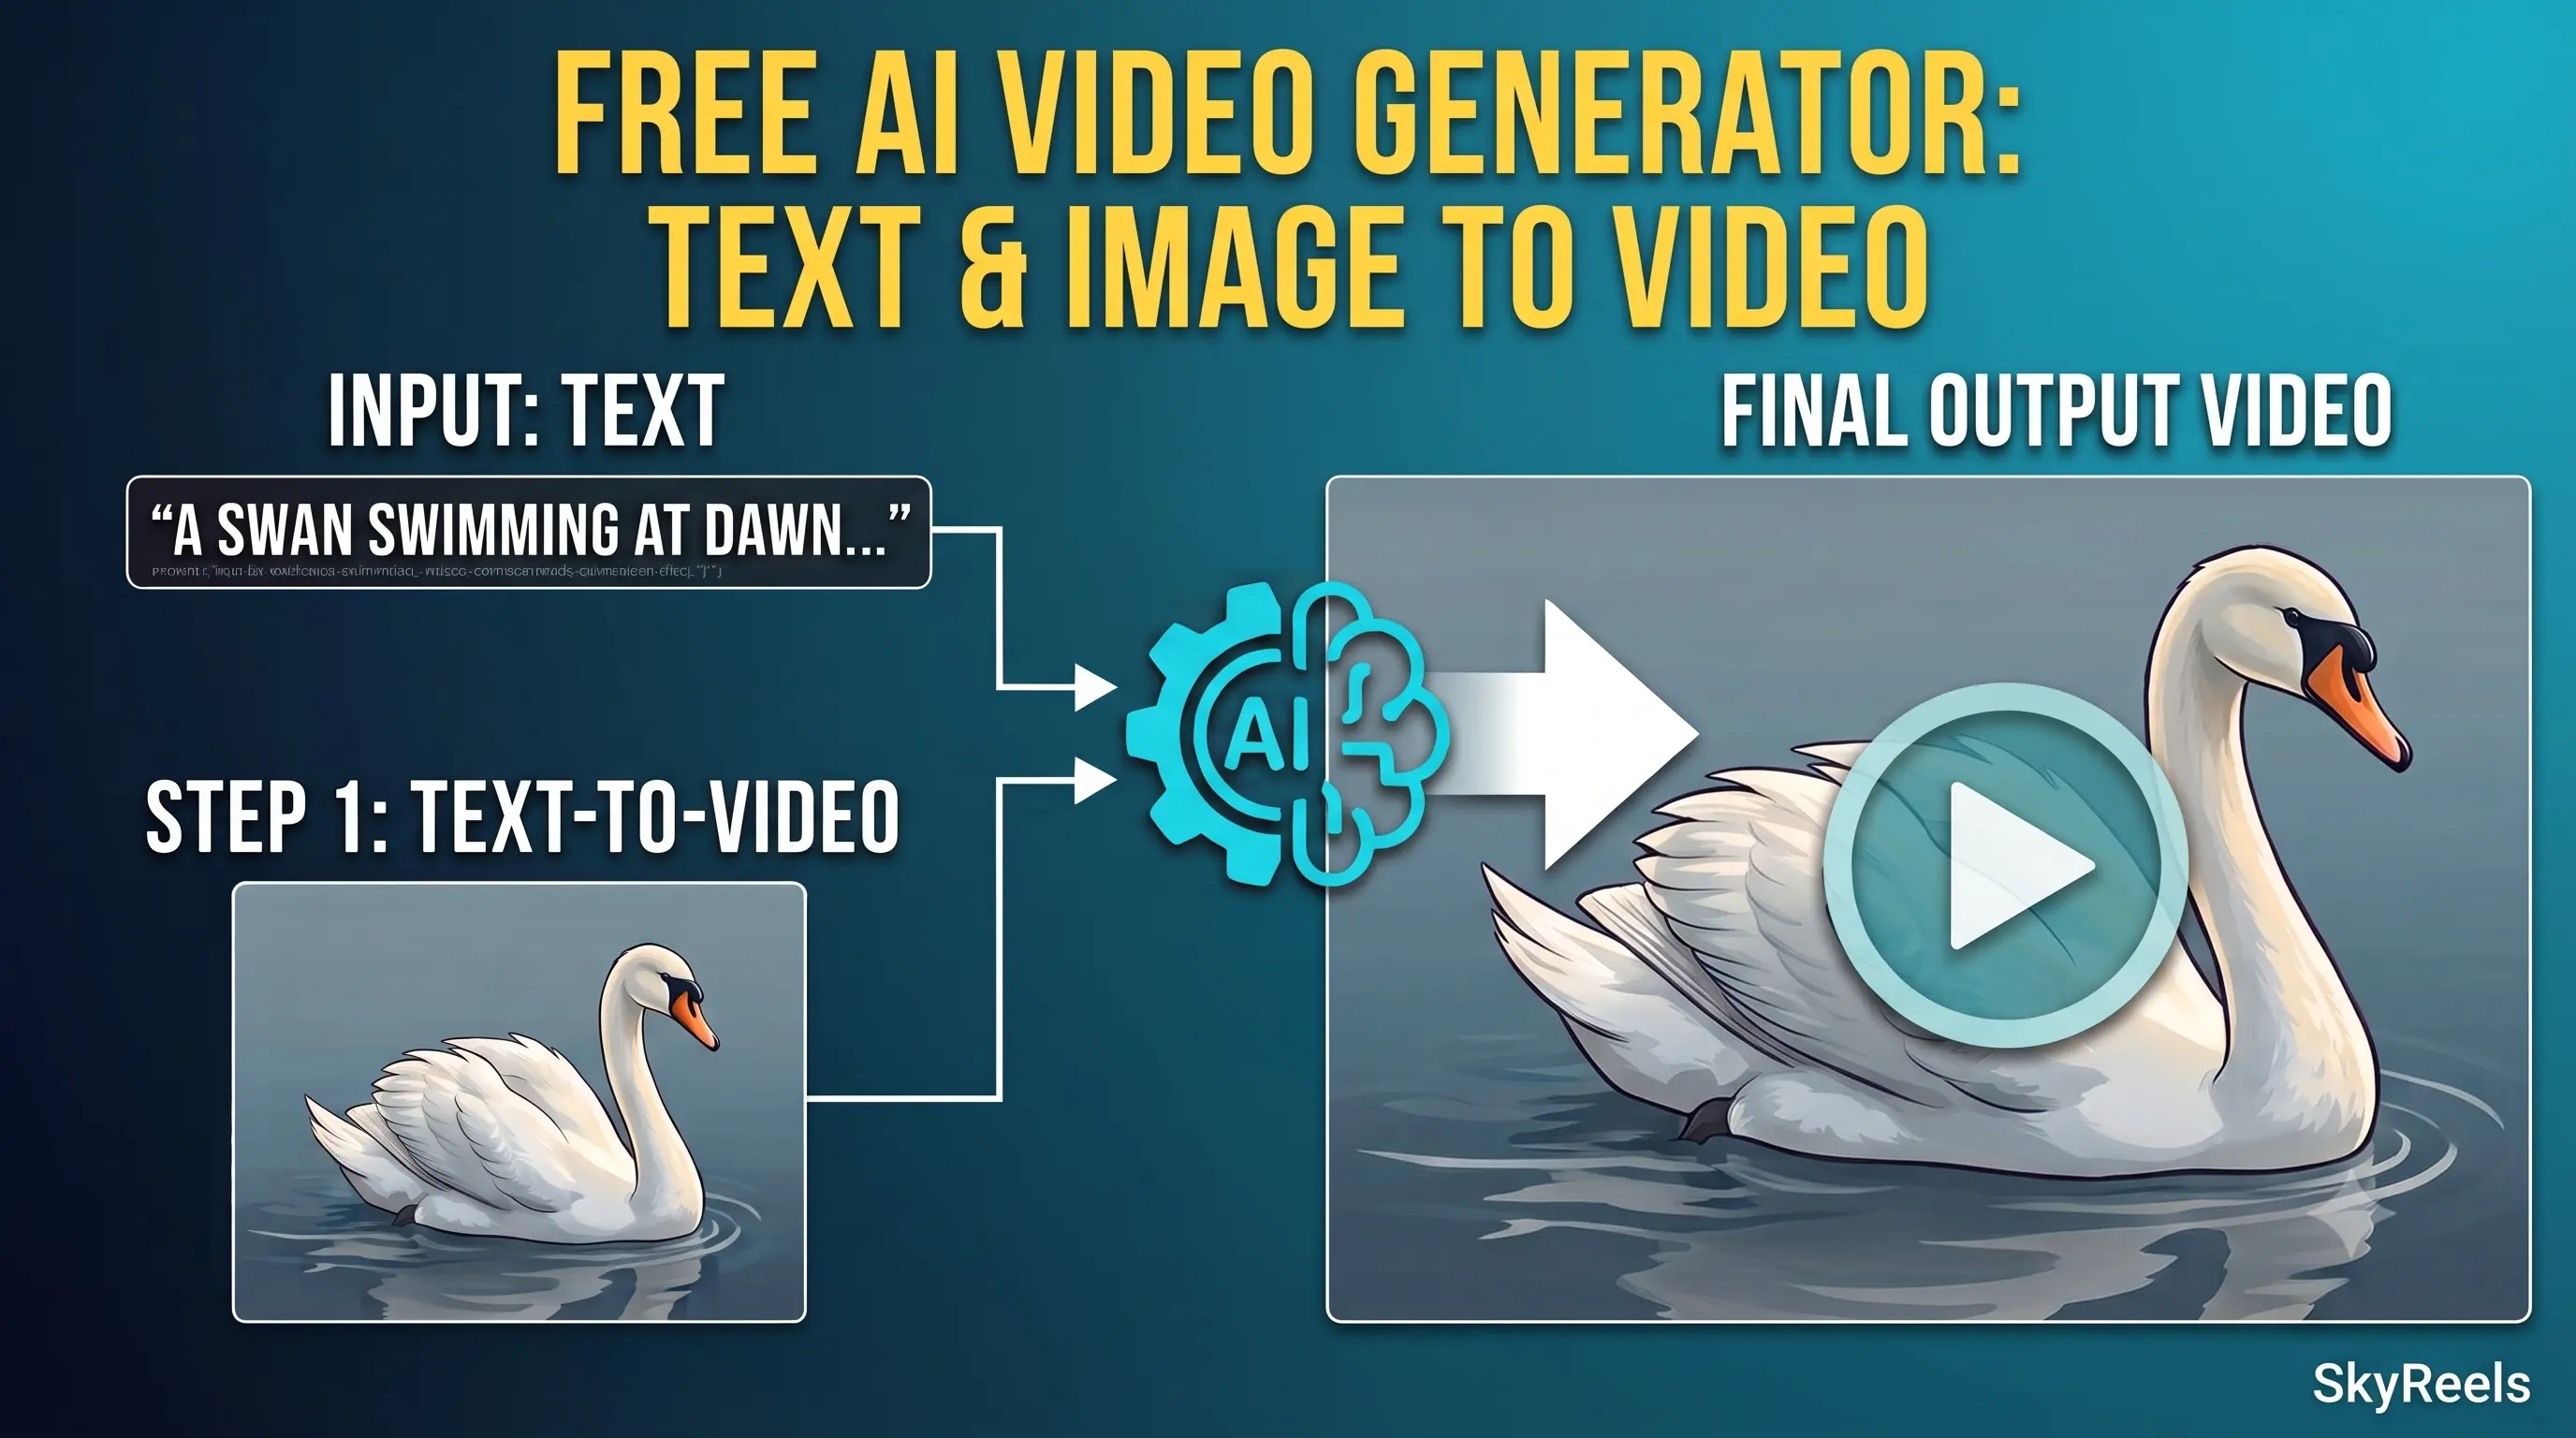
Generating high-quality, long-form AI video locally has long felt out of reach for independent creators and developers without access to enterprise-grade server clusters. SkyReels V2 changes this dynamic completely by introducing an open-source, infinite-length film generative model built on an innovative AutoRegressive Diffusion-Forcing architecture. This step-by-step SkyReels V2 tutorial demonstrates how to harness these advanced capabilities directly on consumer hardware, bridging the gap between cutting-edge AI research and practical developer execution.
By exploring this guide, readers gain a distinct advantage in running state-of-the-art text-to-video and image-to-video pipelines locally without relying on expensive SaaS API subscriptions. Navigating VRAM constraints, configuring framework environments, and understanding model variants often form significant technical hurdles. This article demystifies these complexities, offering actionable strategies to generate cinematic motion sequences while keeping full ownership of your generative workflow and digital assets.
To achieve this, the practical guide breaks down every stage of the setup process into clear, actionable technical components. Starting with environment configuration—including WSL2, Anaconda, PyTorch, and CUDA drivers—it lays down the fundamental groundwork required for stability. It then transitions directly into tested Python code implementations using Hugging Face diffusers, illustrating how to run both light 1.3B and full-scale 14B models efficiently on accessible setups like the Nvidia RTX 3060 Ti.
Whether the goal is to generate atmospheric text-to-video scenes or transform static photos into fluid cinematic animations, this comprehensive SkyReels V2 tutorial equips developers with exact code structures, scheduler configurations, and memory management tricks. Readers will learn how parameters like CPU offloading, sequential memory optimization, and VAE tiling prevent out-of-memory errors while preserving high visual quality across long-form generations.
Why SkyReels V2 Is a Game-Changer for Local AI Video Generation The field of synthetic video generation has rapidly advanced, but open-source models often face trade-offs between temporal consistency, motion dynamic realism, and maximum video length. SkyReels V2 introduces a fundamental architectural shift to address these specific bottlenecks. By pairing a robust Diffusion Forcing approach with a scalable Multi-modal Large Language Model foundation, it provides fine-grained control over frame sequences while maintaining sharp detail across extended runtimes.
For developers and computer vision enthusiasts, the true power of SkyReels V2 lies in its flexibility across multiple modalities. Traditional pipeline models frequently suffer from identity drift or sudden visual degradation as generation length increases. SkyReels V2 mitigates these issues through shot-aware sequence understanding and specialized captioning datasets, making it capable of executing complex instructions, nuanced subject interactions, and dynamic camera movements seamlessly.
Unlocking these capabilities on standard development rigs requires an understanding of how model architecture aligns with local memory management. By leveraging lighter 1.3B parameter models for fast iteration alongside layer-by-layer CPU offloading strategies for 14B variants, developers can experiment with high-resolution output without enterprise hardware costs. Understanding these technical foundations enables creators to deploy scalable, open-source video pipelines tailored to their specific visual storytelling needs.
How to Generate free AI Videos : SkyReels V2 Tutorial 9 Getting Your Hands Dirty with SkyReels V2: Setting Up and Optimizing Free AI Video Generating high-fidelity, long-form AI video has typically required massive, expensive hardware, but the SkyReels V2 framework democratizes this process. The code we will be diving into is designed to let developers, artists, and computer vision enthusiasts run these state-of-the-art models on consumer-grade GPUs, specifically optimized to squeeze maximum performance out of cards with limited VRAM, such as the NVIDIA RTX 3060 Ti. The ultimate goal of this tutorial is to take you from a raw terminal to a finished, high-quality AI video using both Text-to-Video (T2V) and Image-to-Video (I2V) workflows.
We will start with the critical foundation: setting up the environment. This isn’t just about installing packages; it’s about configuring WSL2, Python, and the CUDA toolkit specifically for optimal performance. The code guides you through creating a clean Anaconda environment and installing precisely tailored versions of PyTorch and additional dependencies like flash-attn and ninja. These components are non-negotiable for enabling the memory-saving techniques that make this entire pipeline possible. Skipping or modifying these precise steps often leads to performance bottlenecks or out-of-memory errors later.
Once the groundwork is laid, the logic transitions to practical execution using the Hugging Face diffusers library. This is where the real complexity is managed behind simple functions. We will first explore the Text-to-Video pipeline, demonstrating how to initialize the “lighter” 1.3B model variant as a baseline. The core target of this code segment is memory management. We configure the scheduler and, most importantly, activate pipeline.enable_model_cpu_offload(). This line is the magic trick for local GPUs: it intelligently moves inactive model parts from the GPU’s VRAM to System RAM (CPU RAM), preventing the card from becoming overloaded during the intensive diffusion process.
Finally, we apply this optimization logic to the massive 14B parameter model and the Image-to-Video (I2V) workflow. For the 14B model, we elevate the strategy to pipeline.enable_sequential_cpu_offload(). This is an even more aggressive memory saver that offloads the model layer-by-layer. We will even add VAE tiling to assist with memory during the final frame decoding step. For the I2V workflow, the target of the code shifts slightly; it focuses on image pre-processing. The code provides logic to resize the input image according to the model’s patch size and resolution targets, ensuring smooth transition and temporal consistency without exceeding VRAM limits.
How does this optimization allow large models to run on mid-range hardware? By utilizing diffusers built-in methods like enable_model_cpu_offload() and enable_sequential_cpu_offload(), the pipeline intelligently moves parts of the model not currently required for calculation from the GPU’s VRAM into System RAM (CPU memory). While this increases processing time slightly due to data transfer, it dramatically lowers the peak VRAM required at any single moment, which is the exact bottleneck that typically prevents larger models (like the 14B parameter version) from running on consumer cards like the RTX 3060 Ti.
Link to the tutorial here .
Download the code for the tutorial here or here .
Link for Medium users here
Master Computer Vision
Follow my latest tutorials and AI insights on my
Personal Blog .
Beginner Complete CV Bootcamp
Foundation using PyTorch & TensorFlow.
Get Started → Interactive Deep Learning with PyTorch
Hands-on practice in an interactive environment.
Start Learning → Advanced Modern CV: GPT & OpenCV4
Vision GPT and production-ready models.
Go Advanced →
How to Generate free AI Videos : SkyReels V2 Tutorial 10
Setting Up the Perfect Launchpad for Your Local AI Video Environment Before you can generate a single frame of video, you need to build a robust and stable foundation. This section is absolutely critical because AI video models depend heavily on specific hardware drivers and highly optimized math libraries. We are going to walk through setting up a isolated Python environment and installing the precise version of PyTorch that matches your computer’s GPU capabilities.
By following these exact steps, you ensure that the complex code responsible for calculating the video frames can communicate directly and efficiently with your graphics card’s cores. This alignment between software and hardware is what prevents random crashes and maximizes your generation speed. Skipping or rushing this setup is the number one cause of frustration when working with local AI models, so take your time and get it right.
In this first block of code, we focus entirely on the groundwork. We assume you are working within a terminal (like PowerShell on Windows after running wsl to enter Linux, or a standard Linux terminal). We will clone the official SkyReels V2 repository, create a clean virtual sandbox using Anaconda to prevent conflicts with other projects, and then install the foundational tools like PyTorch and specialized attention layers that drastically reduce memory usage.
# Open Powershell and run wsl for Linux wsl ### Navigate to the tutorials directory and clone the SkyReels repository. cd tutorials git clone https://github.com/SkyworkAI/SkyReels-V2 cd SkyReels-V2 ### Create and activate a new isolated environment using Anaconda. conda create -n SkyReels python= 3.10 .12 conda activate SkyReels ### --- PyTorch Installation Instructions --- ### # Please check your hardware's actual requirements. # The code below installs special versions derived from your GPU architecture. # Choose ONE command from the list below based on your system! nvcc --version ### (ROCM 6.1 for Linux Users only) # pip install torch==2.5.1 torchvision==0.20.1 torchaudio==2.5.1 --index-url https://download.pytorch.org/whl/rocm6.1 ### (ROCM 6.2 for Linux Users only) # pip install torch==2.5.1 torchvision==0.20.1 torchaudio==2.5.1 --index-url https://download.pytorch.org/whl/rocm6.2 ### (CUDA 11.8 users) # pip install torch==2.5.1 torchvision==0.20.1 torchaudio==2.5.1 --index-url https://download.pytorch.org/whl/cu118 ### (CUDA 12.1 users) # pip install torch==2.5.1 torchvision==0.20.1 torchaudio==2.5.1 --index-url https://download.pytorch.org/whl/cu121 ### (CUDA 12.4 users) - Recommended for modern hardware like RTX 3060 Ti pip install torch== 2.5 .1 torchvision== 0.20 .1 torchaudio== 2.5 .1 --index-url https://download.pytorch.org/whl/cu124 ### (CPU only) - Only use if you do NOT have an NVIDIA GPU # pip install torch==2.5.1 torchvision==0.20.1 torchaudio==2.5.1 --index-url https://download.pytorch.org/whl/cpu ### --- Post-PyTorch Dependencies --- ### ### Install core compilation tools and performance optimizers. pip install packaging ninja setuptools pip install psutil ninja packaging ### Install Flash-Attention without trying to build isolated components. pip install flash-attn --no-build-isolation ### Install remaining essential requirements from the provided list. pip install -r requirements.txt ### Launch Visual Studio Code (if installed) and adjust setting. # 1. Run "code ." from the terminal. # 2. Make sure your working folder is "SkyReels". # 3. Choose the "SkyReels" interpreter using <Ctrl> <Shift> <p>. Why do I need specific CUDA versions of PyTorch? Standard PyTorch is built to be compatible with many systems, but it isn’t fully optimized for your specific NVIDIA graphics card’s math cores. By installing the version compiled with the correct CUDA driver (e.g., CUDA 12.4), you are essentially installing a specialized engine translator that allows PyTorch to speak the precise machine language required for peak performance on that GPU.
Note: Getting this setup correct ensures all subsequent steps will work without frustrating ‘Cuda Out of Memory’ errors. Once finished, we are ready to generate.
Freeing up VRAM on Mid-Range Cards for Effortless AI Text-to-Video Generation Generating high-quality video from a simple text prompt is incredibly VRAM-intensive. This section targets the most common bottleneck for consumer hardware—not having enough graphics memory. The 1.3B variant of the model is significantly lighter, and by combining it with intelligent VRAM offloading techniques, we can achieve fast results without upgrading our hardware.
This block of code is a direct implementation of memory optimization. We use a key command: pipeline.enable_model_cpu_offload(). This instruction is crucial: it tells the framework to move different model components from the GPU’s ultra-fast VRAM to your computer’s larger system RAM whenever they aren’t actively being used in a calculation step. While this transfer adds some processing time, it slashed the peak VRAM usage, allowing us to run the model comfortably.
We will focus purely on the Text-to-Video pipeline here. The script loads the necessary models in their efficient data types (torch.bfloat16), configures a scheduler, activates that life-saving VRAM offloading, and finally provides a diverse selection of inspiring prompts. This sets the stage for running the heaviest computational step in a controlled, hardware-friendly environment.
import torch from diffusers import AutoModel, SkyReelsV2DiffusionForcingPipeline, UniPCMultistepScheduler from diffusers.utils import export_to_video ### Define the ID for the smaller, lighter 1.3B model version. model_id = " Skywork/SkyReels-V2-DF-1.3B-540P-Diffusers " # 1. Load VAE and Pipeline ### Load the VAE (Variational Autoencoder) in standard 32-bit float for stability. vae = AutoModel.from_pretrained ( model_id, subfolder= " vae " , torch_dtype=torch.float32 ) ### Load the main SkyReels Pipeline using efficient 16-bit bfloat16 to save VRAM. pipeline = SkyReelsV2DiffusionForcingPipeline.from_pretrained ( model_id, vae = vae, torch_dtype = torch.bfloat16 ) # 2. Configure Scheduler ### Set the 'flow_shift' parameter optimal for the Text-to-Video pipeline (8.0). flow_shift = 8.0 pipeline.scheduler = UniPCMultistepScheduler.from_config ( pipeline.scheduler.config, flow_shift=flow_shift ) # 3. Critical VRAM Management ### Activates intelligent CPU offloading: moves inactive model parts to System RAM. pipeline.enable_model_cpu_offload () # 4. Text Prompt Library # Swan Scene prompt1 = ( "A graceful white swan with a curved neck swimming in a serene lake at dawn, " "its reflection perfectly mirrored in the still water as mist rises from the surface." ) # Venice Watch Melting Scene prompt2 = ( "A surreal, " "giant ornate pocket watch melting over the edge of a stone balcony in a quiet Venice-style city at sunset." "Golden liquid time drips slowly from its hands into the glowing canal below, creating soft concentric ripples." ) # Mechanical Dragon Scene prompt3 = ( "A majestic bioluminescent mechanical dragon, " "crafted from dark chrome and glowing cyan neon tubing," "resting atop a snowy skyscraper in Tokyo at night." ) # Celestial Whale Scene prompt4 = ( "A massive celestial whale made of translucent blue crystal gliding gracefully through a glowing forest pool." "Deep vibrant purples and emerald greens illuminate the underwater scene." ) ### Select the prompt for generation from the list above. prompt = prompt4 What exactly does enable_model_cpu_offload() do? This powerful command instructs the diffusers library to intelligently manage your GPU’s VRAM. Instead of loading the entire massive model (e.g., text encoder, UNet, and VAE) into VRAM at once, it only keeps the specific component currently being used in a step. The remaining parts are temporarily stored in your computer’s standard system RAM (DDR memory), freeing up massive amounts of graphics memory at the cost of slight data transfer time.
Note: This optimization is a direct result of our careful environment setup. With the pipeline configured and memory offloaded, we are ready to run the inference loop and generate our video file.
Freeing up VRAM on Mid-Range Cards for Effortless AI Text-to-Video Generation Generating high-quality video from a simple text prompt is incredibly VRAM-intensive. This section targets the most common bottleneck for consumer hardware—not having enough graphics memory. The 1.3B variant of the model is significantly lighter, and by combining it with intelligent VRAM offloading techniques, we can achieve fast results without upgrading our hardware.
This block of code is a direct implementation of memory optimization. We use a key command: pipeline.enable_model_cpu_offload(). This instruction is crucial: it tells the framework to move different model components from the GPU’s ultra-fast VRAM to your computer’s larger system RAM whenever they aren’t actively being used in a calculation step. While this transfer adds some processing time, it slashed the peak VRAM usage, allowing us to run the model comfortably.
We will focus purely on the Text-to-Video pipeline here. The script loads the necessary models in their efficient data types (torch.bfloat16), configures a scheduler, activates that life-saving VRAM offloading, and finally provides a diverse selection of inspiring prompts. This sets the stage for running the heaviest computational step in a controlled, hardware-friendly environment.
import torch from diffusers import AutoModel, SkyReelsV2DiffusionForcingPipeline, UniPCMultistepScheduler from diffusers.utils import export_to_video ### Define the ID for the smaller, lighter 1.3B model version. model_id = " Skywork/SkyReels-V2-DF-1.3B-540P-Diffusers " # 1. Load VAE and Pipeline ### Load the VAE (Variational Autoencoder) in standard 32-bit float for stability. vae = AutoModel.from_pretrained ( model_id, subfolder= " vae " , torch_dtype=torch.float32 ) ### Load the main SkyReels Pipeline using efficient 16-bit bfloat16 to save VRAM. pipeline = SkyReelsV2DiffusionForcingPipeline.from_pretrained ( model_id, vae = vae, torch_dtype = torch.bfloat16 ) # 2. Configure Scheduler ### Set the 'flow_shift' parameter optimal for the Text-to-Video pipeline (8.0). flow_shift = 8.0 pipeline.scheduler = UniPCMultistepScheduler.from_config ( pipeline.scheduler.config, flow_shift=flow_shift ) # 3. Critical VRAM Management ### Activates intelligent CPU offloading: moves inactive model parts to System RAM. pipeline.enable_model_cpu_offload () # 4. Text Prompt Library # Swan Scene prompt1 = ( "A graceful white swan with a curved neck swimming in a serene lake at dawn, " "its reflection perfectly mirrored in the still water as mist rises from the surface." ) # Venice Watch Melting Scene prompt2 = ( "A surreal, " "giant ornate pocket watch melting over the edge of a stone balcony in a quiet Venice-style city at sunset." "Golden liquid time drips slowly from its hands into the glowing canal below, creating soft concentric ripples." ) # Mechanical Dragon Scene prompt3 = ( "A majestic bioluminescent mechanical dragon, " "crafted from dark chrome and glowing cyan neon tubing," "resting atop a snowy skyscraper in Tokyo at night." ) # Celestial Whale Scene prompt4 = ( "A massive celestial whale made of translucent blue crystal gliding gracefully through a glowing forest pool." "Deep vibrant purples and emerald greens illuminate the underwater scene." ) ### Select the prompt for generation from the list above. prompt = prompt4 What exactly does enable_model_cpu_offload() do? This powerful command instructs the diffusers library to intelligently manage your GPU’s VRAM. Instead of loading the entire massive model (e.g., text encoder, UNet, and VAE) into VRAM at once, it only keeps the specific component currently being used in a step. The remaining parts are temporarily stored in your computer’s standard system RAM (DDR memory), freeing up massive amounts of graphics memory at the cost of slight data transfer time.
Note: This optimization is a direct result of our careful environment setup. With the pipeline configured and memory offloaded, we are ready to run the inference loop and generate our video file.
Pushing Memory Limits: Running the Full 14B Video Model on Mid-Range GPUs The lighter 1.3B model we used previously is fast, but the massive 14B parameter version offers significantly superior temporal consistency and finer detail. The problem is that running a 14B model usually requires massive enterprise hardware. This section is all about implementing the aggressive , next-level VRAM-saving techniques needed to squeeze this model onto a card like an RTX 3060 Ti. It’s the ultimate guide for hardware maximalism.
This block of code is a direct upgrade in memory strategy. While enable_model_cpu_offload() moves inactive components, we go further here by activating pipeline.enable_sequential_cpu_offload(). This even more extreme optimization offloads the model layer-by-layer within the UNet itself. Furthermore, we even add VAE Tiling (enable_tiling()), which helps decodes the massive 540P latent space into a final image frame-by-frame, rather than in one giant memory burst.
The logic starts by explicitly clearing existing CUDA cache and forcing garbage collection to ensure we start with a truly clean VRAM slate. We then initialize the pipeline using the 14B model ID and meticulously activate those layer-by-layer offloading, sequential offloading, and VAE tiling optimizations. By using the same inference steps and parameters as the 1.3B model, this script effectively swaps in the vastly more powerful model while keeping the hardware usage strictly within limits.
import torch import gc from diffusers import AutoModel, SkyReelsV2DiffusionForcingPipeline, UniPCMultistepScheduler from diffusers.utils import export_to_video ### Define the ID for the massive 14B model variant. model_id = " Skywork/SkyReels-V2-DF-14B-540P-Diffusers " ### Explicitly clear CUDA cache and collect garbage to maximize available VRAM. torch.cuda.empty_cache () gc.collect () # 1. Load VAE and Pipeline print ( "Loading VAE (14B)..." ) vae = AutoModel.from_pretrained ( model_id, subfolder= " vae " , torch_dtype=torch.float32 ) print ( "Loading Pipeline (14B)..." ) pipeline = SkyReelsV2DiffusionForcingPipeline.from_pretrained ( model_id, vae = vae, torch_dtype = torch.bfloat16 ) # 2. Configure Scheduler (Using standard parameters) flow_shift = 8.0 pipeline.scheduler = UniPCMultistepScheduler.from_config ( pipeline.scheduler.config, flow_shift=flow_shift ) # 3. Apply Extreme VRAM Optimization ### Activates aggressive, layer-by-layer CPU offloading within the model itself. pipeline.enable_sequential_cpu_offload () ### Activate VAE Tiling to prevent final memory burst during frame decoding. if hasattr ( pipeline.vae, " enable_tiling " ) : pipeline.vae.enable_tiling () # 4. Define Text Prompt and Generation Params pipeline.set_progress_bar_config ( disable = False ) prompt = ( "A graceful white swan with a curved neck swimming in a serene lake at dawn, " "its reflection perfectly mirrored in the still water as mist rises from the surface." ) # 5. Run Full Inference Loop using Same Parameters print ( "Starting 14B inference with extreme VRAM savings..." ) output = pipeline ( prompt = prompt, num_inference_steps = 30 , height = 544 , width = 960 , base_num_frames = 97 , num_frames = 257 , # Keep same frames (~10s) as 1.3B for fair test. overlap_history = 17 , addnoise_condition = 20 , ar_step = 0 , ) .frames[ 0 ] # 6. Save and Export Output Video export_to_video(output, " dragon_14B_full.mp4 " , fps= 24 , quality= 8 ) print ( "Video generated successfully with 14B model!" ) How does enable_sequential_cpu_offload() differ from the standard model_cpu_offload? While enable_model_cpu_offload moves entire major components (like the Text Encoder or VAE) off the GPU when not in use, enable_sequential_cpu_offload is significantly more aggressive. It breaks down the model’s most massive component, the UNet, into individual layers. As the diffusion loop processes each layer, it loads it into VRAM, uses it, and then immediately swaps it out for the next one. This adds significantly more processing time but lowers the required peak VRAM so low that even a 14B model can run on a consumer GPU.
Note: This advanced optimization unlocks the full potential of local hardware. With text-to-video mastered, we move to the final technique: animating static images into video.
Animating the Impossible: Turning Local Images into Fluid AI Videos (Skyreels v2 tutorial ) While converting a text prompt into video is magical, having the power to animate a precise static image is the ultimate creative control. This final section introduces the Image-to-Video (I2V) workflow, which lets you feed a pre-existing image (e.g., a photo, digital art, or a character portrait) into the SkyReels model to breathe fluid, consistent motion into it. This is a game-changer for digital content creators.
This block of code manages the unique input and pre-processing requirements of the I2V pipeline. It is crucial because the model cannot simply generate new frames; it must understand the existing visual “identity” of the input image and construct a coherent sequence that flows directly from it. This logic must handle loading the correct I2V model, pre-processing the user’s input image, and setting unique scheduler configurations designed specifically for animating existing visual concepts.
The code focuses on initializing the optimized 1.3B parameter I2V model, activating our proven VRAM offloading, and then loading your chosen image. It includes vital helper functions to handle the input image: aspect_ratio_resize ensures the image matches the model’s precise target size and patched architecture, maintaining temporal consistency and prevent visual drift. We then add a specific text prompt to help guide the motion (e.g., “blue bird takes off,” or “clockwork explorer takes heavy steps”), providing unparalleled creative control over the animation.
import numpy as np import torch import torchvision.transforms.functional as TF from diffusers import AutoencoderKLWan, SkyReelsV2ImageToVideoPipeline, UniPCMultistepScheduler from diffusers.utils import export_to_video from PIL import Image # 1. Load I2V VAE and Pipeline ### Define the ID for the optimized 1.3B Image-to-Video (I2V) model variant. model_id = " Skywork/SkyReels-V2-I2V-1.3B-540P-Diffusers " print ( "Loading I2V VAE and Pipeline..." ) vae = AutoencoderKLWan.from_pretrained ( model_id, subfolder= " vae " , torch_dtype=torch.float32 ) pipeline = SkyReelsV2ImageToVideoPipeline.from_pretrained ( model_id, vae = vae, torch_dtype = torch.bfloat16 ) # 2. Fix for potential data type mismatch in some environments. if hasattr(pipeline, " image_encoder " ) and pipeline.image_encoder is not None: pipeline.image_encoder.to(dtype =torch.bfloat16) # 3. Configure Scheduler ### Set the optimal 'flow_shift' parameter optimal specifically for I2V (5.0). flow_shift = 5.0 pipeline.scheduler = UniPCMultistepScheduler.from_config ( pipeline.scheduler.config, flow_shift=flow_shift ) # 4. VRAM Optimization (Proven local optimization strategy) pipeline.enable_model_cpu_offload () pipeline.set_progress_bar_config ( disable = False ) # 5. Load and Process Input Image ### Define the path to your local starting image file. image_path1 = " My-Media/flf2v_input_first_frame.png " image_path2 = " My-Media/image2.png " ### Choose the image file to use as the animation source. image_path = image_path2 print (f "Loading local image from: {image_path}" ) first_frame = Image.open ( image_path ) .convert ( "RGB" ) # Helper function to ensure image matches patch size and target area (540P). def aspect_ratio_resize ( image, pipeline, max_area= 544 * 960 ) : aspect_ratio = image.height / image.width mod_value = pipeline.vae_scale_factor_spatial * pipeline.transformer.config.patch_size[ 1 ] height = round ( np.sqrt(max_area * aspect_ratio ) ) // mod_value * mod_value width = round ( np.sqrt(max_area / aspect_ratio ) ) // mod_value * mod_value image = image.resize (( width , height )) return image, height, width ### Automatically resize and process the image for the model. first_frame, height, width = aspect_ratio_resize ( first_frame, pipeline ) # 6. Define Prompts to Guide the Motion # Blue Bird Animation Prompt prompt1 = ( "CG animation style, a small blue bird takes off from the ground, flapping its wings. " "The bird's feathers are delicate, with a unique pattern on its chest. " ) # Clockwork Explorer Animation Prompt prompt2 = ( "The clockwork explorer slowly lifts the crystal lantern, " "causing the pulsing violet energy inside it to shine brighter. " "glowing particles float out of the lantern into the cold night air, " "cinematic slow motion, dynamic lighting, ultra-realistic physics." ) ### Select the motion prompt based on your chosen image. prompt_to_use = prompt2 # 7. Run Full I2V Inference Loop print ( "Starting Image-to-Video generation loop..." ) output = pipeline ( image = first_frame, prompt = prompt_to_use, num_inference_steps = 30 , height = height, width = width, guidance_scale = 5.0 , # Recommended specifically for I2V (5.0 vs 8.0 for T2V) num_frames = 97 , # 97 frames (~4s) is a good starting point for I2V animation. ) .frames[ 0 ] # 8. Save and Export Output Video export_to_video(output, " i2v_output_1.3B.mp4 " , fps= 24 , quality= 8 ) print ( "Image-to-Video generated successfully with guided motion!" ) Why do I need a motion prompt for Image-to-Video generation? Although you provide a base image, the model needs to understand how that scene should move . The motion prompt (e.g., “cat stirs batter,” or “blue bird takes off”) guides the animation logic, ensuring the synthesized frames are physically coherent and follow your intended narrative. Without it, the model would simply try to continue the scene based on the image features, leading to much less predictable and often incoherent visual motion.
Note: This optimization closes our advanced loop. We have demonstrated how to build the environment, run efficient T2V, push the powerful 14B model onto consumer cards, and finally, animate local images with precision.
FAQ : What is the maximum video length I can generate on a mid-range GPU? On cards like an RTX 3060 Ti (8GB), you can typically generate about 10–15 seconds of video by using the memory tricks in this tutorial. Attempting to go much longer usually leads to ‘Cuda Out of Memory’ errors, even with optimizations enabled.
Why did my generation fail with ‘Cuda Out of Memory’ even with optimizations enabled? This happens if your chosen output duration (`num_frames`) exceeds your available VRAM plus the System RAM used for offloading. You can resolve this by shortening the `num_frames` or lowering the `base_num_frames` slightly (e.g., from 97 to 57) to established a manageable memory baseline.
Why does Image-to-Video generation require a motion prompt? The motion prompt tells the AI engine how to animate the static image, transforming visual prediction into guided storytelling. It ensures consistent and physically coherent motion paths predicted from your image rather than chaotic visual continuation.
Why is the first video generation slowest? The first inference call triggers a massive warmup process. This initializes model offloading by moving weights to System RAM and compiles necessary CUDA kernels on the GPU, an initialization that only happens once per session and speeds up subsequent generations.
Is `pipeline.enable_sequential_cpu_offload()` safe to use on all GPUs? Yes, but it’s an extreme speed-for-memory trade-off. It broken down the model layer-by-layer within the UNet itself, maximizing memory savings so aggressive that massive models (like 14B) can run, but it is vastly slower than other offloading methods.
How does `flash-attn` affect local video generation? Flash-Attention provides highly optimized implementations of the complex attention mechanisms. By substituting inefficient standard code with optimized kernels, it drastically reduces peak VRAM, directly enabling larger models and longer videos on memory-constrained hardware.
Why does the I2V workflow need explicit image pre-processing? The model synthesized video based on divisible ‘patches’. The provided code ensures the image aspect ratio matches the patch grid architecture, crucial for prevent misaligned visual artifacts and ensuring seamless predicted motion prediction.
Can I run these models on older GTX series cards? Theoretically yes if they support CUDA, but newer cards (RTX 30-series+) are required for modern performance drivers and efficient data types like `bfloat16`. Without these, memory bottlenecks penalize performance or prevent these tricks from working altogether.
Why are we installing CUDA 12.4 drivers in the setup? CUDA 12.4 introduced significant performance improvements and memory management optimizations crucial for modern GPUs like the RTX 3060 Ti, particularly when combined with Flash-Attention 2.5 and PyTorch 2.5.
What’s the difference between the 1.3B and 14B model variants? B signifies parameters (1.3 vs 14 Billion). The 14B model has significantly more ‘brain power’, enabling vastly better visual quality, finer details, and superior consistency but requires the advanced, aggressive optimizations shown to run locally.
Skyreels v2 tutorial – Summary This comprehensive SkyReels V2 tutorial has demonstrated how to democratize local AI video generation by carefully aligning environment configuration with hardware-specific optimization techniques. We covered the precise setup process, demonstrated memory-efficient Text-to-Video generation, pushed the boundaries by running massive 14B models on mid-range GPUs, and finally, unlocked unparalleled creative control with localized Image-to-Video animation. By following this guide, developers and creators are now equipped to synthesize complex, consistent, and long-form AI video sequences directly on their own hardware.
Pushing the Limits of What’s Possible Locally: Democratizing AI Video This comprehensive SkyReels V2 tutorial has demonstrated how to democratize state-of-the-art local AI video generation. The technical value provided in this guide directly addresses the most common hurdle for independent creators and developers: hardware accessibility. By carefully aligning precise environment configurations (like specialized CUDA driver versions of PyTorch and Flash-Attention) with the unique, automated VRAM-saving hooks provided by the Hugging Face diffusers library, we have established a proven blueprint for running massive, cinematic models without enterprise resources.
We started with a focus on stability, walking through a flawless environment setup and the foundational principles of CPU offloading using the lighter, faster 1.3B model. This crucial baseline confirmed that local mid-range GPUs could indeed generate high-quality output. From that point, the guide transitioned into advanced maximalism, revealing how an aggressive layer-by-layer offloading strategy can even squeeze the incredibly powerful 14B parameter model onto a card with limited memory. This advanced optimization is a game-changer for those who refuse to sacrifice visual detail or temporal coherence due to budget constraints.
Finally, we unlocked the highest form of localized creative control by automating the transition from static images into fluid video. The I2V workflow demonstrates how to predicted coherent motion from existing visuals, providing narrative consistency that text alone can never achieve. By following this complete, hands-on tutorial, creators now possess the full toolkit needed to execute sophisticated AI video production locally—retaining complete ownership of their assets, workflow, and artistic vision.
Connect ☕ Buy me a coffee
🖥️ Email: feitgemel@gmail.com
🌐 eranfeit.net
🤝 Fiverr: My Services
Enjoy,
Eran
 Skip to content