Last Updated on 24/09/2026 by Eran Feit
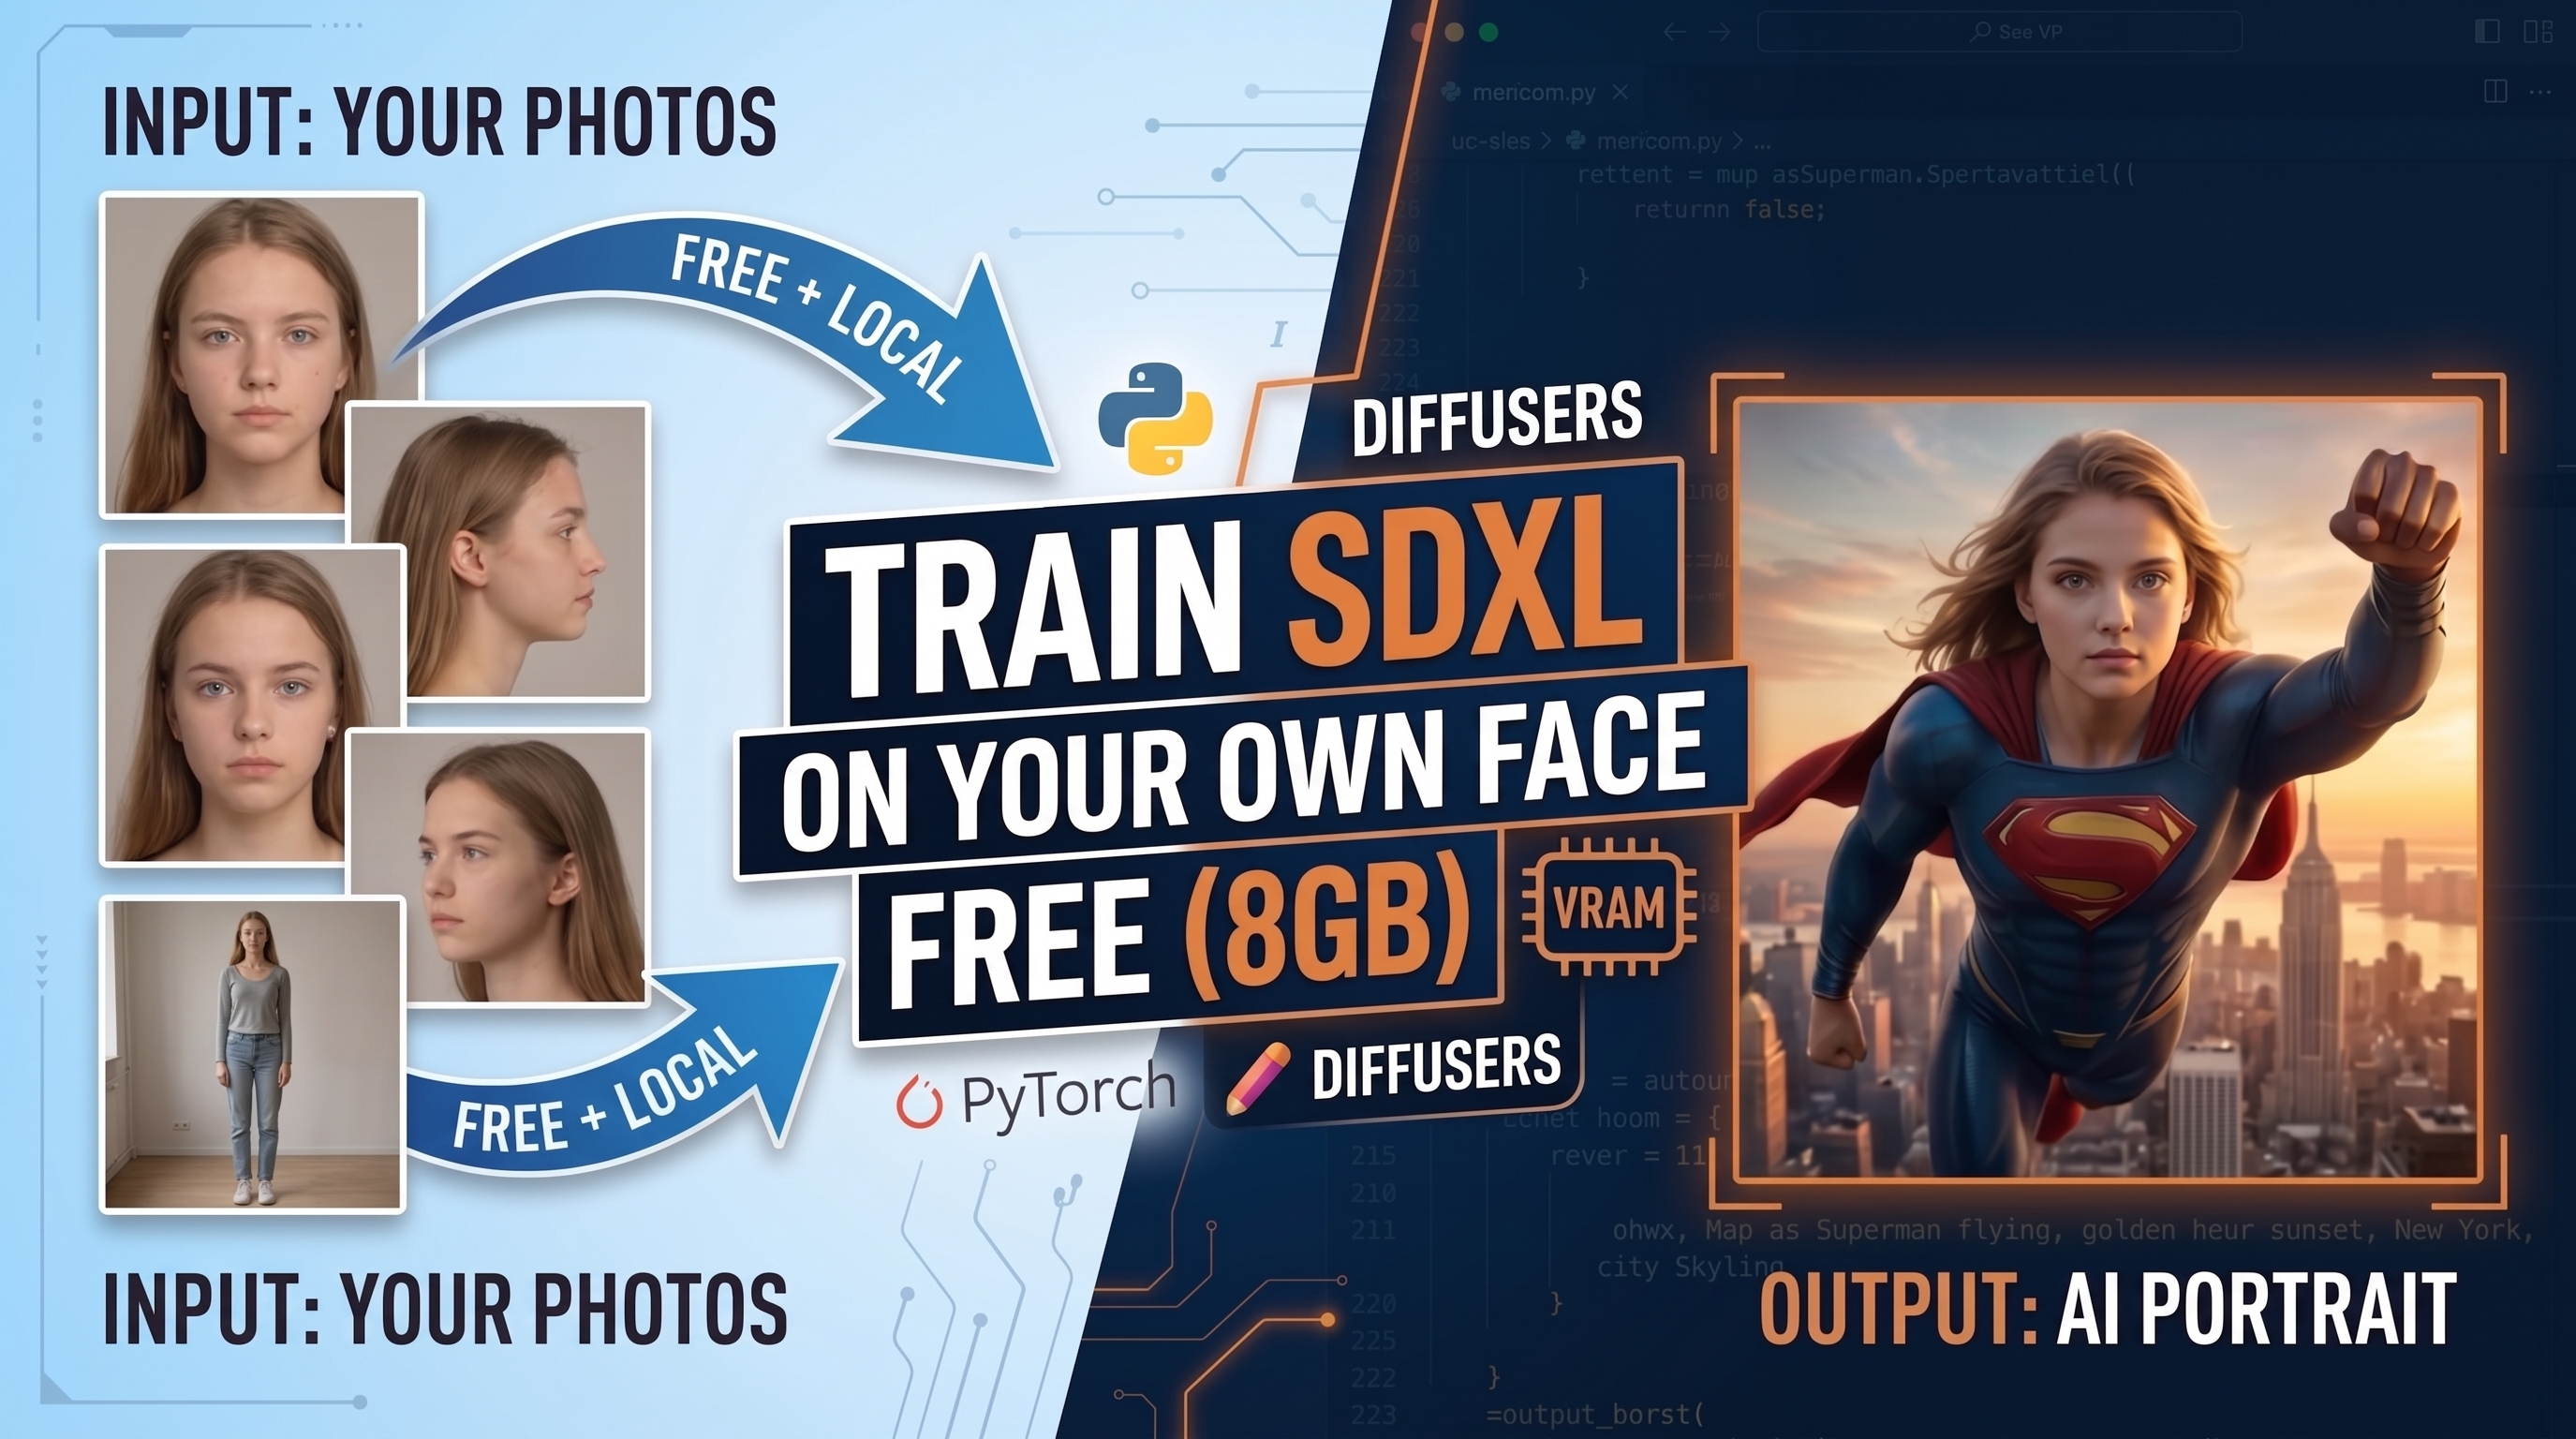
To train SDXL LoRA models locally has long felt out of reach for anyone without an enterprise workstation or a bottomless cloud computing budget. This comprehensive engineering tutorial walks through the exact blueprint for fine-tuning Stable Diffusion XL directly on a consumer 8GB GPU, teaching you how to inject your personal likeness into custom generation pipelines with zero CUDA Out-of-Memory crashes. Instead of wrestling with opaque WebUI settings or third-party wrappers, you will implement a lean, production-ready Python architecture from the ground up using native Hugging Face tooling.
Running generative AI models locally gives you total ownership over your data, your weights, and your creative output. Relying on remote endpoints or paid rental platforms introduces latency, unpredictable per-hour billing, and privacy trade-offs when uploading personal portraits. Mastering this process hands you a reproducible, hardware-conscious methodology that scales from simple hobby experiments to robust machine learning automation workflows, all executed within your existing local operating environment.
You will achieve this by dismantling the primary memory bottlenecks that choke consumer cards during diffusion fine-tuning. The guide demonstrates how to decouple the compute phases cleanly: permanently offloading dual CLIP text encoders after prompt pre-encoding, pre-caching image latents via the VAE straight into host system RAM, and training only low-rank adapter layers on the UNet using 8-bit AdamW. These surgical optimizations keep active VRAM allocation well below the critical 8GB threshold throughout the entire training cycle.
Once the adapter weights are finalized, you will configure an optimized inference script to validate the results. By orchestrating sequential CPU offload, VAE tiling, and an efficient second-order DPM-Solver++ scheduler, you will generate high-fidelity, photorealistic portraits across cinematic and editorial styles using your custom identity trigger. Every stage is backed by reproducible, modular Python code ready for direct execution on Windows and WSL2 setups.
Why Learning to Train SDXL LoRA on Consumer GPUs Changes Everything Adapting foundational diffusion architectures to recognize a specific human subject requires surgical precision, particularly when moving from legacy 512×512 models to the 1024×1024 base resolution of Stable Diffusion XL. The core goal of this approach is low-rank adaptation: rather than modifying all 2.6 billion parameters of the base UNet, we inject tiny, trainable rank decomposition matrices into cross-attention layers. This allows the network to learn nuanced facial characteristics, hair structure, and skin texture while locking base model weights entirely in place and outputting an ultra-compact adapter file that weighs less than one hundred megabytes.
On consumer-grade hardware like an 8GB graphics card, achieving this adaptation demands a completely restructured execution graph. Standard fine-tuning pipelines keep text encoders, the variational autoencoder, and the full UNet resident in GPU memory simultaneously, causing immediate out-of-memory errors on the very first forward-backward pass. By splitting the workflow into discrete preprocessing and caching phases, the graphics card is only tasked with computing gradients across designated attention projection targets, drastically lowering the resource floor without sacrificing latent fidelity.
Mastering this local technique bridges the gap between high-level prompt engineering and low-level model customization. You gain complete control over hyperparameter tuning, loss convergence tracking, gradient accumulation, and scheduler dynamics, providing deep insight into how modern diffusion backbones process conditioned noise. The end result is a repeatable personal pipeline that delivers studio-grade identity preservation without third-party platform lock-in or recurring cloud compute expenses.
The Complete Guide to Training SDXL LoRA on Your Own Face 15 Let’s Build a Lean, 8GB-Friendly SDXL Face Training Pipeline The provided Python code implements a high-performance, low-memory workflow for fine-tuning Stable Diffusion XL (SDXL) using Low-Rank Adaptation (LoRA) on a proprietary face dataset. The primary engineering goal is to overcome the strict 8GB VRAM limitation common in consumer-grade GPUs, such as the NVIDIA RTX 3060 or 4060, which typically crash with Out-of-Memory (OOM) errors when attempting full SDXL fine-tuning. By utilizing the Hugging Face ecosystem—specifically diffusers, accelerate, and peft—and integrating memory-efficient technologies like bitsandbytes, this script provides a reproducible, local solution for creating high-fidelity personalized models without requiring expensive cloud compute.
How does this script manage to train a massive model like SDXL on only 8GB of VRAM? The script utilizes a combination of advanced memory-saving techniques: first, it pre-encodes all text prompts and caches VAE latents to system RAM, permanently removing the bulky text encoder and VAE models from the GPU after preprocessing; second, it employs 8-bit quantization via the BitsAndBytes optimizer and enables gradient checkpointing, which drastically reduces the memory required for storing model parameters and intermediate activation gradients during the training process.
The “Step 1” script establishes a novel preprocessing phase designed specifically to minimize active GPU memory allocation. Before the training loop even begins, the dual CLIP text encoders (vital for SDXL’s prompt understanding) are loaded, used to process the instance prompt, and then immediately deleted from memory, with the resulting embeddings cached in system RAM. A similar one-time process occurs for the image dataset: the bulky Variational Autoencoder (VAE) loads, converts all training images into latent space, caches these latents to RAM, and is then permanently purged. This surgical approach ensures the only significant model component residing on the GPU during actual training is the UNet, the core diffusion mechanism itself.
The configuration of the UNet’s adaptation is managed through the peft library using LoRA. Rather than attempting the computationally prohibitive task of updating all 2.6 billion parameters within the SDXL UNet, the code injects lightweight, trainable adapter layers (low-rank matrices) into key cross-attention modules (to_k, to_q, to_v, to_out.0). This focuses the learning process strictly on capturing the visual features defining the target face, resulting in a compact, efficient output file (.safetensors) that modifies the model’s output without altering its foundation. This targeting strategy is critical for balancing model performance with limited hardware resources.
During the actual optimization loop, the script integrates bitsandbytes to swap the standard, memory-intensive AdamW optimizer for an 8-bit quantized version. Furthermore, gradient checkpointing is enabled on the UNet, trade-offs compute time for memory by recalculating some intermediate activations during the backward pass rather than storing them all in VRAM. To counteract potential memory fragmentation—a frequent cause of OOM crashes on Windows and WSL2 systems—the script also explicitly sets the PYTORCH_CUDA_ALLOC_CONF environment variable to enforce specific memory allocation strategies and aggressive garbage collection.
Following successful training, the script outputs the finalized LoRA weights. This compact file can then be utilized by standard inference pipelines. The included “Step 2” inference script demonstrates how to load these custom adapters onto the generic SDXL Base model and leverage additional runtime optimizations, such as sequential CPU offloading and VAE tiling, to ensure stable image generation within the same 8GB memory footprint. This completes the end-to-end workflow, enabling the production of photorealistic images featuring the trained likeness on modest hardware.
Link to the tutorial here .
Download the code for the tutorial here or here .
Link for Medium users here
Master Computer Vision
Follow my latest tutorials and AI insights on my
Personal Blog .
Beginner Complete CV Bootcamp
Foundation using PyTorch & TensorFlow.
Get Started → Interactive Deep Learning with PyTorch
Hands-on practice in an interactive environment.
Start Learning → Advanced Modern CV: GPT & OpenCV4
Vision GPT and production-ready models.
Go Advanced → The Complete Guide to Training SDXL LoRA on Your Own Face 16 The Complete Guide to Training SDXL LoRA on Your Own Face To train SDXL LoRA models locally has long felt out of reach for anyone without an enterprise workstation or a deep budget for cloud compute rentals. This comprehensive tutorial provides a battle-tested blueprint to fine-tune Stable Diffusion XL on consumer-grade hardware with only 8GB of VRAM—completely avoiding CUDA Out-of-Memory (OOM) crashes. Instead of relying on bloated WebUI interfaces with unpredictable errors, you will build a lean, production-grade Python workflow based on the official Hugging Face diffusers, accelerate, and peft libraries.
Running generative AI models on your local machine gives you total ownership over your dataset, hyperparameter configurations, and resulting checkpoint weights. Relying on remote endpoints or paid cloud rentals introduces recurring subscription costs, queue times, and significant data privacy risks—especially when handling personal portraits. By setting up this pipeline, you establish an automated, fully reproducible training process on your local GPU.
You will achieve this level of efficiency by systematically eliminating memory bottlenecks across each phase of the diffusion pipeline. The tutorial demonstrates how to isolate and pre-encode text prompts through dual CLIP models, pre-cache image latents to system RAM with the VAE, and apply 8-bit quantized AdamW alongside gradient checkpointing to the UNet. Together, these techniques slash peak VRAM consumption, allowing an 8GB GPU to train an SDXL LoRA cleanly and reliably.
Once training is complete, you will deploy a dedicated inference script that loads your custom weights onto the base SDXL model. By taking advantage of sequential CPU offload, VAE tiling, and an efficient second-order DPM-Solver++ scheduler, you can generate high-resolution, photorealistic portraits across various artistic styles using your personalized trigger token.
Setting Up the Production Environment and Curating Your Dataset Setting up a clean and reliable environment is the critical first phase when preparing to train SDXL LoRA models locally. Modern diffusion pipelines require specific versions of CUDA-enabled PyTorch, Hugging Face libraries, and 8-bit quantization engines to run without blowing past your VRAM limits. Using an isolated Conda environment within Windows Subsystem for Linux (WSL2) or native Linux prevents dependency hell and provides a stable foundation for hardware acceleration.
Preparing your training images requires attention to quality over raw quantity. A carefully selected collection of 15 to 25 high-resolution photos provides ample coverage of facial geometry while preventing model drift. The collection should contain a balanced mix of close-up headshots, upper-body framing, and full-length portraits captured across various lighting setups, backgrounds, and facial expressions. This ensures that the resulting LoRA learns your underlying facial structure rather than memorizing a specific background or lighting angle.
Avoid pictures with sunglasses, heavy accessories, or aggressive filters that mask your facial landmarks. Images can be supplied in standard .jpg or .png formats; there is no need to crop them manually to square dimensions because the training pipeline handles resizing and center cropping automatically during the pre-caching stage.
How can I install all dependencies and set up the working directory for 8GB training? You can prepare your environment by executing the following shell commands in your terminal to set up Conda, install PyTorch with CUDA 12.6, install the exact Hugging Face libraries, and structure your project folders.
# Open Powershell and run wsl for Linux wsl # create new anaconda env conda create -n TrainYourFace python= 3.11 conda activate TrainYourFace ! ----------------------------------------------------------------! # Install Pytorch nvcc --version # ROCM 6.1 (Linux only) pip install torch== 2.6 .0 torchvision== 0.21 .0 torchaudio== 2.6 .0 --index-url https://download.pytorch.org/whl/rocm6.1 # ROCM 6.2.4 (Linux only) pip install torch== 2.6 .0 torchvision== 0.21 .0 torchaudio== 2.6 .0 --index-url https://download.pytorch.org/whl/rocm6.2.4 # CUDA 11.8 pip install torch== 2.6 .0 torchvision== 0.21 .0 torchaudio== 2.6 .0 --index-url https://download.pytorch.org/whl/cu118 # CUDA 12.4 pip install torch== 2.6 .0 torchvision== 0.21 .0 torchaudio== 2.6 .0 --index-url https://download.pytorch.org/whl/cu124 ############ ----->>>>> CUDA 12.6 pip install torch== 2.6 .0 torchvision== 0.21 .0 torchaudio== 2.6 .0 --index-url https://download.pytorch.org/whl/cu126 #################################### # CPU only pip install torch== 2.6 .0 torchvision== 0.21 .0 torchaudio== 2.6 .0 --index-url https://download.pytorch.org/whl/cpu ! ----------------------------------------------------------------! # install python dependencies : pip install diffusers== 0.32 .2 pip install transformers== 4.49 .0 pip install accelerate== 1.4 .0 pip install peft== 0.14 .0 pip install bitsandbytes== 0.45 .2 pip install safetensors== 0.5 .2 pip install invisible-watermark== 0.2 .0 # Choose a working folder. I named it "Train-Your-Own-face-with-LoRA" under "c:/Tutorilas" cd tutorilas mkdir " Train-Your-Own-face-with-LoRA " cd " Train-Your-Own-face-with-LoRA " #Step 1: Organize the Dataset Folder 1. Create a dedicated project directory: dataset/my_face. 2. Add 15 –25 high-quality images: 3. Around 10 close-up portrait shots. 4. Around 5 –8 medium shots (upper body / waist-up ). 5. 2 –3 full-body shots. 6. Ensure strong diversity in backgrounds, lighting conditions, facial expressions, and clothing. 7. Avoid sunglasses, hats, heavy shadows, or filters that obscure facial features. 8. Supported formats: .jpg or .png. Manual cropping to 1024 x1024 is not required ; the training pipeline handles resizing and bucket aspect-ratio adjustments automatically. #Step 2: Download my code and copy it to the working folder Copy the Python code " Step1-train-your-face-images.py " and " step2-test-your-face-lora.py " to the working folder #Step 3 - Run Vscod for Generate image with your face : 1. Run " code . " 2. Make sure your working folder is " TrainYourFace " 3. Choose the TrainYourFace enviroment using < cnt l > + < Shif t > + P , and select inteperter " TrainYourFace " #Step 4 - Run the code : Step1 for train , and step2 for generate your images Summary :
Laying the Groundwork with Automated Launcher and Dependencies Running complex generative architectures on an 8GB GPU requires careful resource management right from initialization. In this opening section of the training script, we configure crucial operating system flags to optimize memory handling under Windows and WSL2. By adjusting how the memory allocator operates, we eliminate fragmentation before any neural networks are pulled into memory.
Furthermore, we remove the friction of having to remember complex terminal commands to launch distributed scripts. The code detects whether it is currently running inside an accelerate runtime environment. If executed as a standard script from your terminal or IDE, it automatically creates a managed sub-process with FP16 mixed precision and resumes seamlessly.
Finally, we import our core deep learning libraries. We bring in Hugging Face’s diffusers for model architectures and schedulers, peft for low-rank adaptation, and transformers for tokenization and text encoding. This establishes the complete toolset required for our lightweight training pipeline.
Sample dataset images : The Complete Guide to Training SDXL LoRA on Your Own Face 17 The Complete Guide to Training SDXL LoRA on Your Own Face 18 The Complete Guide to Training SDXL LoRA on Your Own Face 19 How does the auto-launch mechanism prevent recursive process loops? The script inspects os.environ for the variable ACCELERATE_TORCH_DEVICE and a custom flag INSIDE_ACCELERATE_RELAUNCH. When spawning the child process, it injects this flag, ensuring that subsequent executions run directly instead of launching additional sub-processes.
### Direct the operating system to interpret this script using the Python environment. #!/usr/bin/env python ### Define the character encoding for the source code as UTF-8. # coding=utf-8 ### Import the OS module for interacting with environment variables and filesystem paths. import os ### Import the sys module to access command-line arguments and system exit functions. import sys ### Import subprocess to manage child processes and re-invoke the CLI when necessary. import subprocess ### Prevent CUDA memory fragmentation under WSL2 and Windows. ### Sets the garbage collection threshold and restricts the maximum split size for memory allocations. os.environ[ "PYTORCH_CUDA_ALLOC_CONF" ] = " garbage_collection_threshold:0.8,max_split_size_mb:128 " ### Inspect the environment to see if we are already running inside an Accelerate instance. ### Also check our custom sentinel flag to prevent endless recursive invocations. if "ACCELERATE_TORCH_DEVICE" not in os.environ and os.environ.get ( "INSIDE_ACCELERATE_RELAUNCH" ) != " 1 " : ### Output status notifying that the script is restarting under the proper accelerator. print ( "[AUTO-LAUNCH] Detected direct execution. Launching via accelerate with single-GPU fp16 profile..." ) ### Assemble the command string to run accelerate launch with fp16 enabled. cmd = [ "accelerate" , " launch " , "--num_processes=1" , "--mixed_precision=fp16" , __file__ ] + sys.argv [ 1 : ] ### Clone existing system environment variables. child_env = os.environ.copy () ### Set the sentinel environment variable to confirm the sub-process has been invoked. child_env[ "INSIDE_ACCELERATE_RELAUNCH" ] = " 1 " ### Run the subprocess with the updated environment and wait for completion. result = subprocess.run ( cmd, env=child_env ) ### Terminate the parent process using the return code of the child process. sys.exit(result.returncode ) ### Import argparse for handling command-line configuration options. import argparse ### Import gc to manually trigger Python's garbage collection cycle. import gc ### Import itertools for efficient looping operations. import itertools ### Import json to support JSON serialization and parsing if needed. import json ### Import logging to record status messages and errors throughout execution. import logging ### Import math to access rounding and mathematical utility functions. import math ### Import shutil for high-level directory and file manipulation. import shutil ### Import time to measure training duration and throughput rates. import time ### Import warnings to suppress non-critical library alerts. import warnings ### Import nullcontext for managing context managers conditionally. from contextlib import nullcontext ### Import Path from pathlib for clean, cross-platform path handling. from pathlib import Path ### Import numpy for numerical and array transformations. import numpy as np ### Import PyTorch core tensor and autograd engine. import torch ### Import PyTorch neural network functional primitives. import torch.nn.functional as F ### Import the gradient checkpointing utility from PyTorch. import torch.utils.checkpoint ### Import transformers to access tokenizer and CLIP text encoder modules. import transformers ### Import the main Accelerator class for hardware-agnostic distributed training. from accelerate import Accelerator ### Import get_logger from accelerate to handle unified multi-process logging. from accelerate.logging import get_logger ### Import helper utilities for distributed data parallel setups and seed initialization. from accelerate.utils import DistributedDataParallelKwargs, ProjectConfiguration, set_seed ### Import Hugging Face Hub utilities to allow model saving and repo creation. from huggingface_hub import create_repo, hf_hub_download, download_folder if hasattr ( transformers, ' download_folder ' ) else None, upload_folder ### Import packaging version to verify software compatibility. from packaging import version ### Import LoRA configuration and weight injection helpers from the PEFT library. from peft import LoraConfig, set_peft_model_state_dict ### Import utility to separate and retrieve LoRA state dicts from underlying models. from peft.utils import get_peft_model_state_dict ### Import PIL Image for loading and manipulating graphic files. from PIL import Image ### Import exif_transpose to correct image rotation based on metadata tags. from PIL.ImageOps import exif_transpose ### Import safetensors utilities to save model weights efficiently and securely. from safetensors.torch import load_file, save_file ### Import PyTorch base Dataset class for building custom data pipelines. from torch.utils.data import Dataset ### Import image transforms for standardizing input shapes and values. from torchvision import transforms ### Import tqdm progress bar for visual tracking of loops. from tqdm.auto import tqdm ### Import Hugging Face auto classes for tokenizers and model configs. from transformers import AutoTokenizer, PretrainedConfig ### Import base diffusers module. import diffusers ### Import specific models, pipelines, and noise schedulers from the Diffusers library. from diffusers import ( AutoencoderKL, DDPMScheduler, DPMSolverMultistepScheduler, EDMEulerScheduler, EulerDiscreteScheduler, StableDiffusionXLPipeline, UNet2DConditionModel, ) ### Import helper mixin for applying LoRA layers to diffusion pipelines. from diffusers.loaders import StableDiffusionLoraLoaderMixin ### Import learning rate scheduling helper functions. from diffusers.optimization import get_scheduler ### Import utilities for setting state dicts and casting parameters. from diffusers.training_utils import _set_state_dict_into_text_encoder, cast_training_params ### Import converter for saving diffusers-compatible LoRA state dicts. from diffusers.utils import convert_state_dict_to_diffusers ### Import utility to detect if a module is compiled with torch.compile. from diffusers.utils.torch_utils import is_compiled_module ### Initialize the logger instance for recording script execution details. logger = get_logger ( __name__ ) Summary: This code initializes runtime safety mechanisms, prevents VRAM allocation errors, handles automatic process relaunching, and imports the necessary dependencies.
Defining Pipeline Parameters and Pre-Encoding Text Prompts (Train SDXL Lora) Managing resources effectively when training an SDXL model requires setting strict boundaries on memory-heavy operations. In this section, we define the command-line arguments that configure the run, balancing fidelity against VRAM constraints by capping training resolution to 768×768 pixels, setting the micro-batch size to 1, and configuring low-rank dimensions.
The section also establishes helper functions for memory monitoring and model loading. Most importantly, it introduces encode_prompt() to handle SDXL’s dual text encoders (CLIP ViT-L and OpenCLIP ViT-bigG). Instead of retaining these encoders in VRAM alongside the UNet, the script computes the pooled and unpooled text embeddings for your prompt up front.
By caching these text representations immediately and removing the text encoders from memory, we recover more than a gigabyte of VRAM. This guarantees that your GPU resources are dedicated solely to the mathematical operations required by the diffusion model.
Why do we pre-encode text prompts before starting training? Because we use a fixed trigger prompt during training, the resulting text conditioning tensors never change. Pre-encoding them allows us to delete both heavy text encoders from memory, freeing up significant VRAM for the training loop.
### Monitor VRAM usage metrics. def get_gpu_memory_usage () : ### Query CUDA if accessible. if torch.cuda.is_available () : ### Retrieve the total memory currently occupied by active tensors in gigabytes. allocated = torch.cuda.memory_allocated () / (1024**3) ### Retrieve the total memory reserved by the PyTorch caching allocator. reserved = torch.cuda.memory_reserved () / (1024**3) ### Return formatted string with live allocation and reservation values. return f " VRAM Alloc: {allocated:.2f} GB | Reserved: {reserved:.2f} GB " ### Return a fallback message if no compatible CUDA device is present. return " GPU memory stats unavailable " ### Dynamically resolve text encoder classes for SDXL. def import_model_class_from_model_name_or_path ( pretrained_model_name_or_path: str, revision: str, subfolder: str = " text_encoder " ) : ### Load configuration for target subfolder. text_encoder_config = PretrainedConfig.from_pretrained ( pretrained_model_name_or_path, subfolder=subfolder, revision=revision ) ### Identify the class name of the encoder. model_class = text_encoder_config.architectures[ 0 ] ### Match against known standard CLIP implementations. if model_class == " CLIPTextModel " : from transformers import CLIPTextModel return CLIPTextModel ### Match against the projected variant used in SDXL's second text encoder. elif model_class == " CLIPTextModelWithProjection " : from transformers import CLIPTextModelWithProjection return CLIPTextModelWithProjection ### Catch unhandled architectures. else: raise ValueError ( f "{model_class} is not supported." ) ### Parse execution options and hyperparameters. def parse_args () : ### Initialize argument parser instance. parser = argparse.ArgumentParser ( description = " SDXL LoRA Training for Custom Face. " ) ### Target foundation model identifier. parser.add_argument( "--pretrained_model_name_or_path" , type=str, default= " stabilityai/stable-diffusion-xl-base-1.0 " ) ### Optional model revision. parser.add_argument( "--revision" , type=str, default=None ) ### Optional model weight variant. parser.add_argument( "--variant" , type=str, default=None ) ### Folder containing your training photos. parser.add_argument( "--instance_data_dir" , type=str, default= " dataset/my_face " ) ### Set the text prompt incorporating your unique subject trigger token. parser.add_argument( "--instance_prompt" , type=str, default= " a photo of ohwx man " ) ### Specify the local directory where trained weights will be saved. parser.add_argument( "--output_dir" , type=str, default= " sdxl_lora_face " ) ### Set the pseudo-random number generator seed for deterministic behavior. parser.add_argument( "--seed" , type=int, default= 42 ) ### Set image resolution for training (768 keeps VRAM usage within 8GB). parser.add_argument( "--resolution" , type=int, default= 768 ) ### Define the per-device micro-batch size. parser.add_argument( "--train_batch_size" , type=int, default= 1 ) ### Set total number of training optimization steps. parser.add_argument( "--max_train_steps" , type=int, default= 650 ) ### Determine step interval for dumping intermediate model checkpoints. parser.add_argument( "--checkpointing_steps" , type=int, default= 200 ) ### Set number of steps to accumulate gradients before updating weights. parser.add_argument( "--gradient_accumulation_steps" , type=int, default= 2 ) ### Define the base optimizer learning rate. parser.add_argument( "--learning_rate" , type=float, default= 1 e-4 ) ### Define the learning rate scheduler decay policy. parser.add_argument( "--lr_scheduler" , type=str, default= " constant " ) ### Set execution precision mode to fp16 to conserve memory. parser.add_argument( "--mixed_precision" , type=str, default= " fp16 " , choices=[ " no " , " fp16 " , " bf16 " ] ) ### Configure the rank dimension of the low-rank adaptation matrices. parser.add_argument( "--rank" , type=int, default= 4 ) ### Set dropout rate inside the LoRA layers to prevent overfitting. parser.add_argument( "--lora_dropout" , type=float, default= 0.0 ) ### Set logging frequency for terminal output. parser.add_argument( "--log_interval" , type=int, default= 10 ) ### Configure maximum gradient norm for gradient clipping. parser.add_argument( "--max_grad_norm" , default= 1.0 , type=float ) ### Parse inputs and return namespace. return parser.parse_args () ### Define dataset container for cached latents. class CachedLatentsDataset ( Dataset ) : ### Store precomputed tensors and geometric dimensions. def __init__ ( self, latents_list, original_sizes, crop_coords ) : self.latents_list = latents_list self.original_sizes = original_sizes self.crop_coords = crop_coords ### Return dataset record count. def __len__ ( self ) : return len ( self.latents_list ) ### Access indexed record. def __getitem__ ( self, index ) : return { "latent" : self.latents_list[index], "original_size" : self.original_sizes[index], "crop_coord" : self.crop_coords[index], } ### Batch formatter for cached latents. def collate_cached ( examples ) : ### Stack tensors into unified training batches. return { "latents" : torch.stack ([ ex [ " latent " ] for ex in examples ]) , "original_sizes" : [ex[ " original_size " ] for ex in examples], "crop_coords" : [ex[ " crop_coord " ] for ex in examples], } ### Helper to tokenize raw string prompts. def tokenize_prompt ( tokenizer, prompt ) : ### Produce truncated and padded tensor IDs. return tokenizer ( prompt, padding = " max_length " , max_length = tokenizer.model_max_length, truncation = True, return_tensors = " pt " , ) .input_ids ### Execute text encoding across both SDXL text encoders. def encode_prompt ( text_encoders, tokenizers, prompt ) : ### Initialize an empty list to gather embeddings from each encoder. prompt_embeds_list = [] ### Iterate through both text encoders and their matching tokenizers. for i, text_encoder in enumerate ( text_encoders ) : tokenizer = tokenizers[i] ### Convert string to tokens. text_input_ids = tokenize_prompt ( tokenizer, prompt ) ### Compute hidden states without building a gradient graph. prompt_embeds = text_encoder ( text_input_ids.to(text_encoder.device ) , output_hidden_states=True, return_dict=False ) ### Extract pooled representation from the first projection. pooled = prompt_embeds[ 0 ] ### Retain the hidden states from the penultimate layer of the text model. prompt_embeds = prompt_embeds[ -1 ][ -2 ] bs_embed, seq_len, _ = prompt_embeds.shape ### Normalize embedding shape across batch and sequence dimensions. prompt_embeds = prompt_embeds.view ( bs_embed, seq_len, -1 ) prompt_embeds_list.append(prompt_embeds ) ### Concatenate hidden states along the feature dimension and reshape pooled projection. return torch.concat ( prompt_embeds_list, dim= -1 ) , pooled.view ( bs_embed, -1 ) Summary: This segment configures the hyperparameters for the training process and defines the logic to extract and preserve text prompt embeddings while completely discarding the underlying text models.
Caching VAE Latents to Host Memory This stage executes the primary setup of the pipeline and carries out the VAE latent pre-caching. First, the script initializes the Accelerator environment, prepares the designated output paths, and sets random seeds for repeatable results. It then runs the previously defined text encoding functions, stores the pooled and unpooled text embeddings, and purges the text encoders from VRAM.
Next, it tackles the image dataset. Running an image through the VAE on every iteration creates a major memory footprint and consumes unnecessary compute cycles. This section loads the VAE model onto the CPU in float32 precision, processes every image from your dataset directory, normalizes the pixels, and compresses them into latent tensors.
These latent tensors, along with the crop and size coordinates required by SDXL, are appended to an in-memory list and loaded into the CachedLatentsDataset. Once all images are processed, the VAE is deleted and garbage-collected, leaving VRAM completely open for training the UNet.
Why is the VAE loaded onto the CPU rather than the GPU during caching? Processing the images through the VAE on the CPU avoids consuming any GPU memory during preprocessing. Because custom datasets are small (15–25 images), the CPU handles this conversion in a matter of seconds without risking a CUDA OOM error.
### Initialize configuration and setup logging environment. args = parse_args () logging_dir = Path ( args.output_dir, " logs " ) accelerator_project_config = ProjectConfiguration ( project_dir = args.output_dir, logging_dir = logging_dir ) kwargs = DistributedDataParallelKwargs ( find_unused_parameters = True ) ### Construct the distributed execution manager. accelerator = Accelerator ( gradient_accumulation_steps = args.gradient_accumulation_steps, mixed_precision = args.mixed_precision, project_config = accelerator_project_config, kwargs_handlers = [kwargs], ) ### Establish basic logger configuration. logging.basicConfig(format = "%(asctime)s - %(levelname)s - %(message)s" , level=logging.INFO ) if args.seed is not None: set_seed(args.seed ) ### Guarantee output directory availability. if accelerator.is_main_process: os.makedirs(args.output_dir, exist_ok=True ) ### Map precision setting to PyTorch datatypes. weight_dtype = torch.float16 if accelerator.mixed_precision == " fp16 " else torch.float32 # --- PHASE 1: PRE-ENCODE TEXT PROMPT --- logger.info( "[PHASE 1] Pre-encoding text prompts..." ) ### Instantiate both tokenizers for SDXL. tokenizer_one = AutoTokenizer.from_pretrained ( args.pretrained_model_name_or_path, subfolder= " tokenizer " , use_fast=False ) tokenizer_two = AutoTokenizer.from_pretrained ( args.pretrained_model_name_or_path, subfolder= " tokenizer_2 " , use_fast=False ) ### Dynamically load corresponding text encoder classes. text_encoder_cls_one = import_model_class_from_model_name_or_path ( args.pretrained_model_name_or_path, args.revision ) text_encoder_cls_two = import_model_class_from_model_name_or_path ( args.pretrained_model_name_or_path, args.revision, subfolder= " text_encoder_2 " ) ### Load text encoder models directly onto GPU. text_encoder_one = text_encoder_cls_one.from_pretrained ( args.pretrained_model_name_or_path, subfolder= " text_encoder " , variant=args.variant ) .to ( accelerator.device, dtype=weight_dtype ) text_encoder_two = text_encoder_cls_two.from_pretrained ( args.pretrained_model_name_or_path, subfolder= " text_encoder_2 " , variant=args.variant ) .to ( accelerator.device, dtype=weight_dtype ) ### Cache text embeddings in memory. with torch.no_grad () : prompt_embeds, unet_add_text_embeds = encode_prompt ([ text_encoder_one, text_encoder_two ] , [ tokenizer_one, tokenizer_two ] , args.instance_prompt ) prompt_embeds = prompt_embeds.to ( accelerator.device ) unet_add_text_embeds = unet_add_text_embeds.to ( accelerator.device ) ### Remove text encoders and clear memory immediately. del tokenizer_one, tokenizer_two, text_encoder_one, text_encoder_two gc.collect () torch.cuda.empty_cache () # --- PHASE 2: PRE-ENCODE AND CACHE VAE LATENTS --- logger.info( "[PHASE 2] Loading images and pre-caching VAE Latents to host RAM (one-time operation)..." ) instance_dir = Path ( args.instance_data_dir ) valid_exts = { " .jpg " , " .jpeg " , " .png " , " .webp " , " .bmp " } ### Collect training image file paths. image_paths = [p for p in instance_dir.iterdir () if p.suffix.lower () in valid_exts] if not image_paths: raise ValueError ( f "No valid images found in {instance_dir}" ) ### Load VAE on CPU to prevent allocation collisions on the GPU. vae = AutoencoderKL.from_pretrained ( args.pretrained_model_name_or_path, subfolder= " vae " , variant=args.variant ) vae.to( "cpu" , dtype=torch.float32 ) ### Set the VAE into evaluation mode. vae.eval () ### Build image transformation operations for scaling and cropping. resize_op = transforms.Resize ( args.resolution, interpolation=transforms.InterpolationMode.LANCZOS ) crop_op = transforms.CenterCrop ( args.resolution ) normalize_op = transforms.Compose ([ transforms.ToTensor(), transforms.Normalize( [ 0.5 ] , [ 0.5 ] ) ]) cached_latents = [] original_sizes = [] crop_coords = [] ### Process all images through the VAE on the host CPU. with torch.no_grad () : for path in tqdm ( image_paths, desc= " Pre-encoding Latents " ) : img = Image.open ( path ) img = exif_transpose ( img ) if img.mode != " RGB " : img = img.convert ( "RGB" ) orig_size = (img.height, img.width ) img = resize_op ( img ) y1 = max ( 0, int ( round((img.height - args.resolution ) / 2.0 ) )) x1 = max ( 0, int ( round((img.width - args.resolution ) / 2.0 ) )) img = crop_op ( img ) tensor_img = normalize_op ( img ) .unsqueeze ( 0 ) .to ( "cpu" , dtype=torch.float32 ) ### Encode image tensor to latent space and apply SDXL scaling factor. latent = vae.encode ( tensor_img ) .latent_dist.sample () * vae.config.scaling_factor cached_latents.append(latent.squeeze(0 ).to ( dtype = weight_dtype )) original_sizes.append(orig_size ) crop_coords.append((y1, x1 )) ### Free VAE memory entirely once all images are encoded. del vae gc.collect () ### Wrap cached latents in dataset and loader. train_dataset = CachedLatentsDataset ( cached_latents, original_sizes, crop_coords ) train_dataloader = torch.utils.data.DataLoader ( train_dataset, batch_size = args.train_batch_size, shuffle = True, collate_fn = collate_cached, num_workers = 0 , ) Summary: This phase extracts and preserves the text embeddings, pre-encodes the training images into latent space on the CPU, and stores them in system RAM, freeing up the GPU for the UNet.
Initializing UNet LoRA Adapters and 8-Bit Optimization This section prepares the core diffusion engine—the SDXL UNet—for training under tight VRAM constraints. The base UNet weights are loaded in 16-bit half-precision (fp16) and frozen (requires_grad_(False)), ensuring that the base model parameters are untouched. Crucially, we activate unet.enable_gradient_checkpointing(), which trades computation time for memory by avoiding storing intermediate activations during the forward pass. (train sdxl lora)
Next, we attach lightweight adapter layers to the UNet using peft.LoraConfig. We target the cross-attention and self-attention projection layers (to_k, to_q, to_v, to_out.0) using a rank of $4$. This rank gives the model enough expressive capacity to learn individual facial geometry while keeping the number of trainable parameters minimal.
To manage these parameters without overloading our 8GB card, we instantiate an 8-bit AdamW optimizer from bitsandbytes (bnb.optim.AdamW8bit). Unlike standard optimizers that consume substantial memory storing 32-bit momentum and variance states, this 8-bit alternative compresses optimizer states to a fraction of their normal size. The model, optimizer, dataloader, and scheduler are then passed to accelerator.prepare().
Why is an 8-bit optimizer required when training on an 8GB GPU? Standard 32-bit optimizers track first and second gradient moments in full precision, consuming gigabytes of VRAM. An 8-bit quantized optimizer maintains comparable accuracy while slashing optimizer memory overhead by over 50%.
# --- PHASE 3: UNET & OPTIMIZER SETUP --- ### Log initialization of UNet and LoRA configuration. logger.info( "[PHASE 3] Loading UNet and configuring LoRA adapters..." ) ### Load base UNet in half precision from the diffusers repository. unet = UNet2DConditionModel.from_pretrained ( args.pretrained_model_name_or_path, subfolder= " unet " , variant=args.variant ) ### Freeze all base UNet parameters so they are not updated during backpropagation. unet.requires_grad_(False ) ### Send the UNet to the assigned GPU device. unet.to(accelerator.device, dtype=weight_dtype ) ### Activate gradient checkpointing to conserve VRAM during backward passes. unet.enable_gradient_checkpointing () ### Build LoRA configuration targeting the attention projections. unet_lora_config = LoraConfig ( r = args.rank, lora_alpha = args.rank, lora_dropout = args.lora_dropout, init_lora_weights = " gaussian " , target_modules = [ " to_k " , "to_q" , " to_v " , " to_out.0 " ], ) ### Attach the LoRA adapter layers to the UNet. unet.add_adapter(unet_lora_config ) ### Extract only the parameters that require gradient updates. unet_lora_parameters = list ( filter(lambda p: p.requires_grad, unet.parameters ()) ) ### Cast the trainable parameters to float32 for training stability. cast_training_params([unet], dtype=torch.float32 ) ### Import the bitsandbytes library for 8-bit optimizer support. import bitsandbytes as bnb ### Initialize memory-saving 8-bit AdamW optimizer. optimizer = bnb.optim.AdamW8bit ( [ { " params " : unet_lora_parameters, " lr " : args.learning_rate} ] , weight_decay = 1 e-4, ) ### Load the default training noise scheduler. noise_scheduler = DDPMScheduler.from_pretrained ( args.pretrained_model_name_or_path, subfolder= " scheduler " ) ### Create a constant learning rate scheduler for steady updates. lr_scheduler = get_scheduler ( args.lr_scheduler, optimizer = optimizer, num_warmup_steps = 0 , num_training_steps = args.max_train_steps, ) ### Register all components with the accelerator for device management and mixed-precision execution. unet, optimizer, train_dataloader, lr_scheduler = accelerator.prepare ( unet, optimizer, train_dataloader, lr_scheduler ) ### Calculate update steps based on gradient accumulation settings. num_update_steps_per_epoch = math.ceil ( len(train_dataloader ) / args.gradient_accumulation_steps ) ### Calculate the total number of epochs required to reach max_train_steps. num_train_epochs = math.ceil ( args.max_train_steps / num_update_steps_per_epoch ) ### Helper function to build additional time/size conditioning vectors for SDXL. def compute_time_ids ( original_size, crop_coord ) : target_size = (args.resolution, args.resolution ) add_time_ids = list ( original_size + crop_coord + target_size ) return torch.tensor ([ add_time_ids ] , device=accelerator.device, dtype=weight_dtype ) Summary: This section isolates the trainable weights by applying LoRA to the UNet’s attention layers, enables gradient checkpointing, and initializes an 8-bit AdamW optimizer to maintain low memory usage. (train sdxl lora)
Executing the Training Loop and Exporting Weights (Train SDXL Lora) With our pipeline configured, the training loop runs across the pre-cached latents. In each step, the script adds Gaussian noise to the cached latents based on randomly chosen timesteps. The noisy latents, along with the text embeddings and SDXL time/size conditioning vectors, are passed through the adapted UNet to predict the added noise.
Gradient accumulation allows us to simulate larger batch sizes without running out of memory. Here, gradient_accumulation_steps=2 updates the model every two batches, keeping peak memory low while maintaining training stability. The script also clips gradients to prevent gradient explosions from destabilizing the newly initialized LoRA weights.
Throughout training, the script logs step counts, loss values, training speed (iterations per second), estimated completion time, and current VRAM usage. Periodic checkpoints are saved to the output directory. Once training finishes, accelerator.unwrap_model() extracts the LoRA weights, which are saved in the portable .safetensors format.
Why is gradient clipping essential when training LoRAs on small datasets? When training on a small dataset of 15–25 images, large gradient updates can destabilize the low-rank matrices and cause the model to diverge or produce visual artifacts. Gradient clipping (max_grad_norm=1.0) stabilizes weight updates throughout training.
### Log the start of training and configuration summary. logger.info( "=" * 60 ) logger.info( " STARTING HIGH-SPEED SDXL TRAINING " ) logger.info( "=" * 60 ) logger.info(f " Training Instances = {len(train_dataset)}" ) logger.info(f " Resolution = {args.resolution}x{args.resolution}" ) logger.info(f " Max Optimization Steps = {args.max_train_steps}" ) logger.info(f " Initial VRAM Usage = {get_gpu_memory_usage()}" ) logger.info( "=" * 60 ) ### Track overall step count across epochs. global_step = 0 ### Set up terminal progress bar. progress_bar = tqdm ( range(0, args.max_train_steps ) , desc= " Steps " , disable=not accelerator.is_local_main_process ) start_time = time.time () running_loss = 0.0 ### Iterate through the dataset for the required number of epochs. for epoch in range ( num_train_epochs ) : ### Set UNet to training mode. unet.train () ### Loop over batches of pre-cached latents. for step, batch in enumerate ( train_dataloader ) : ### Accumulate gradients over multiple sub-steps. with accelerator.accumulate ( unet ) : ### Move cached latents to GPU memory. model_input = batch[ " latents " ].to ( device = accelerator.device, dtype = weight_dtype ) ### Generate random Gaussian noise matching the latent dimensions. noise = torch.randn_like ( model_input ) bsz = model_input.shape[ 0 ] ### Sample random timesteps for the diffusion forward process. timesteps = torch.randint ( 0, noise_scheduler.config.num_train_timesteps, (bsz, ) , device=model_input.device ) .long () ### Add noise to the latents according to the schedule. noisy_model_input = noise_scheduler.add_noise ( model_input, noise, timesteps ) ### Construct SDXL micro-conditioning time IDs. add_time_ids = torch.cat ([ compute_time_ids(s, c) for s, c in zip(batch [ " original_sizes " ] , batch [ " crop_coords " ] ) ]) unet_added_conditions = { "time_ids" : add_time_ids, "text_embeds" : unet_add_text_embeds.repeat ( bsz, 1 ) , } ### Predict noise with the adapted UNet. model_pred = unet ( noisy_model_input, timesteps, prompt_embeds.repeat(bsz, 1 , 1 ) , added_cond_kwargs = unet_added_conditions, return_dict = False, ) [ 0 ] ### Compute Mean Squared Error between predicted noise and actual noise. loss = F.mse_loss ( model_pred.float () , noise.float () , reduction= " mean " ) ### Backpropagate the computed loss. accelerator.backward(loss ) ### Clip gradients to avoid exploding weights. if accelerator.sync_gradients: accelerator.clip_grad_norm_(unet_lora_parameters, args.max_grad_norm ) ### Apply weight updates and advance the learning rate scheduler. optimizer.step () lr_scheduler.step () optimizer.zero_grad () ### Update progress bar and log metrics when gradients are synchronized. if accelerator.sync_gradients: progress_bar.update ( 1 ) global_step += 1 curr_loss = loss.detach () .item () running_loss += curr_loss ### Output metrics at designated intervals. if global_step % args.log_interval == 0 or global_step == 1 : avg_loss = running_loss / (args.log_interval if global_step > 1 else 1 ) elapsed = time.time () - start_time speed = global_step / elapsed if elapsed > 0 else 0 eta_min = ((args.max_train_steps - global_step ) / speed) / 60 if speed > 0 else 0 logger.info( f "[STEP {global_step:03d}/{args.max_train_steps}] " f "Epoch {epoch + 1:02d}/{num_train_epochs} | " f "Loss: {curr_loss:.4f} (Avg: {avg_loss:.4f}) | " f "Speed: {speed:.2f} it/s | " f "ETA: {eta_min:.1f}m | " f"{get_gpu_memory_usage () } " ) running_loss = 0.0 ### Save intermediate checkpoints periodically. if accelerator.is_main_process and global_step % args.checkpointing_steps == 0: save_path = os.path.join(args.output_dir, f " checkpoint-{ global_step} ") accelerator.save_state(save_path) logger.info(f" [CHECKPOINT] Saved state to {save_path} " ) ### Check if maximum training steps have been reached. if global_step >= args.max_train_steps: break ### Wait for all processes before saving the final weights. accelerator.wait_for_everyone() if accelerator.is_main_process: logger.info( " [FINALIZING] Saving LoRA weights... " ) ### Unwrap the base model from the accelerator container. unet_unwrap = accelerator.unwrap_model(unet).to(torch.float32) unet_unwrap = unet_unwrap._orig_mod if is_compiled_module(unet_unwrap) else unet_unwrap ### Extract only the LoRA adapter state dictionary. unet_lora_layers = convert_state_dict_to_diffusers(get_peft_model_state_dict(unet_unwrap)) output_lora_path = os.path.join(args.output_dir, " pytorch_lora_weights.safetensors " ) ### Save the weights in standard Safetensors format. StableDiffusionXLPipeline.save_lora_weights(save_directory=args.output_dir, unet_lora_layers=unet_lora_layers) logger.info(f " [COMPLETED] Weights saved successfully to: {output_lora_path} " ) ### Close down the accelerator runtime. accelerator.end_training() ### Standard Python entry point check. if __name__ == " __main__ " : main() Summary: The training loop computes noise predictions against the pre-cached latents, optimizes adapter parameters using 8-bit AdamW, and exports the final trained weights into a compact .safetensors file.
Configuring the Production Inference Pipeline for Low Memory Now that the custom weights are saved, you can run inference with step2-test-your-face-lora.py. Even during generation, SDXL requires significant VRAM to hold the UNet, text encoders, and VAE simultaneously. To prevent out-of-memory errors on an 8GB card, this script applies two key optimizations.
First, pipeline.enable_model_cpu_offload() dynamically moves sub-modules of the pipeline to the GPU only when they are needed and offloads them back to system RAM immediately afterward. Second, pipeline.enable_vae_tiling() processes the final high-resolution VAE decode in smaller spatial tiles, preventing the large memory spike that occurs when generating 1024×1024 images.
We also replace the default scheduler with DPMSolverMultistepScheduler configured with sde-dpmsolver++ and Karras sigmas. This advanced solver produces sharp, photo-realistic imagery in as few as 30 inference steps, significantly reducing render times compared to standard DDIM or Euler samplers.
Why is VAE tiling necessary when generating 1024×1024 images on an 8GB GPU? The VAE decoder requires substantial temporary VRAM to expand compressed 4-channel latents back into full-resolution RGB pixels. Tiling processes smaller sections of the image sequentially, preventing VRAM spikes during decoding.
### Import OS module for runtime environment flags import os ### Import PyTorch for tensor handling and random seeds import torch ### Import Path for cross-platform path resolution from pathlib import Path ### Import datetime for timestamping generated image filenames from datetime import datetime ### Import the pipeline and scheduler classes from diffusers from diffusers import StableDiffusionXLPipeline, DPMSolverMultistepScheduler ### Set CUDA allocation configuration to prevent fragmentation on Windows/WSL2 os.environ[ "PYTORCH_CUDA_ALLOC_CONF" ] = " garbage_collection_threshold:0.8,max_split_size_mb:128 " ### Define the base model repository identifier base_model_id = " stabilityai/stable-diffusion-xl-base-1.0 " ### Specify the path to our trained LoRA directory lora_dir = " sdxl_lora_face " ### Specify the file name of our trained weights lora_weight_name = " pytorch_lora_weights.safetensors " ### Create output directory for generated images output_dir = Path ( "result" ) output_dir.mkdir(parents =True, exist_ok=True ) print ( "[1/4] Loading SDXL Base Pipeline..." ) ### Instantiate the base pipeline in float16 precision pipeline = StableDiffusionXLPipeline.from_pretrained ( base_model_id, torch_dtype = torch.float16, variant = " fp16 " , use_safetensors = True, ) ### Apply model CPU offload to keep idle components in system RAM pipeline.enable_model_cpu_offload () ### Enable VAE tiling to decode high-resolution images within memory constraints pipeline.enable_vae_tiling () ### Configure the DPM-Solver++ scheduler with Karras sigmas for fast, sharp generation pipeline.scheduler = DPMSolverMultistepScheduler.from_config ( pipeline.scheduler.config, algorithm_type = " sde-dpmsolver++ " , use_karras_sigmas = True, ) print ( "[2/4] Loading trained Face LoRA weights..." ) ### Load the trained LoRA adapter weights into the pipeline pipeline.load_lora_weights(lora_dir, weight_name=lora_weight_name ) Summary: This script segment loads the base model in half-precision, applies CPU offloading and VAE tiling to prevent OOM errors, and attaches our custom LoRA weights.
Generating High-Resolution Portraits with Custom Prompts The second half of step2-test-your-face-lora.py executes image generation using your custom trigger token. In this example, the token "ohwx man" tells the network to use the facial features learned during training. You can place this trigger token into any scene, style, or lighting setup you choose.
To avoid memory spikes during inference, the script generates images one at a time within a loop (num_images = 4), setting a new seed for each image. The cross_attention_kwargs={"scale": lora_scale} parameter controls how strongly the LoRA affects the output. Setting lora_scale = 0.95 strikes a good balance: your likeness remains clear and recognizable while still following the prompt’s stylistic cues.
Each image is rendered at 30 inference steps with a guidance scale of 6.5, then saved with a timestamped filename to the result/ directory.
What is the purpose of setting cross_attention_kwargs={"scale": 0.95}? The scale argument acts as a multiplier for the LoRA adapter weights. A value of 1.0 applies the full weight, while slightly lower values (0.8 to 0.95) give the base model more room to render the surrounding scene and style without distorting facial features.
### Pre-configured prompt templates for different visual styles #Prompt 1: Professional business portrait prompt = " cinematic 8k portrait of ohwx man in a sharp tailored dark navy suit, soft natural window light, bokeh city background, highly detailed skin texture, 85mm lens photography " negative_prompt = " deformed, distorted, disfigured, poorly drawn, bad eyes, blurry, cartoon, 3d render, oversaturated, plastic skin " # Prompt 2: Cyberpunk / Cinematic street style # prompt = "close-up portrait of ohwx man wearing a high-tech matte black utility jacket, illuminated by neon turquoise and magenta street signs, rainy night in Tokyo, wet reflections, shallow depth of field, anamorphic lens, blade runner aesthetic, hyper-realistic, 8k" # negative_prompt = "deformed, distorted, disfigured, poorly drawn, bad eyes, blurry, cartoon, 3d render, oversaturated, plastic skin, drawing, painting" # Prompt 3: Vintage 35mm film photograph # prompt = "authentic 1970s vintage color photograph of ohwx man sitting in a classic European café terrace, warm autumn afternoon sunlight, wearing an earth-toned turtleneck sweater, 35mm film grain, Kodachrome color grading, natural candid expression, soft focus background" # negative_prompt = "modern digital photography, hyper-glossy, plastic skin, CGI, 3d render, cartoon, oversaturated, deformed, distorted, disfigured, bad eyes, blurry, unnatural lighting" ### Active test prompt: Superhero action portrait #prompt = "cinematic dynamic action shot of ohwx man with modern stylish eyeglasses as Superman flying high in the sky, soaring above the skyscrapers of New York City, wearing clear spectacle frames, classic blue textured suit with iconic chest emblem and flowing red cape, dramatic golden hour sunset illumination, lens flare, motion blur on clouds below, hyper-realistic face details, sharp eyes behind glasses, photorealistic 8k, IMAX cinematic composition" #negative_prompt = "sunglasses, tinted glasses, broken frames, deformed, distorted, disfigured, poorly drawn, bad eyes, blurry, cartoon, 3d render, anime, illustration, green screen effect, toy, figurine, plastic suit, fake cape, oversaturated, bad anatomy, extra limbs" ### Set generation parameters num_images = 4 guidance_scale = 6.5 num_inference_steps = 30 lora_scale = 0.95 ### Generate timestamp string for file naming timestamp = datetime.now () .strftime ( "%Y%m%d_%H%M%S" ) print (f "[3/4] Generating {num_images} images sequentially (1-by-1 to stay within 8GB VRAM)..." ) ### Loop through the count and generate each image independently for i in range ( num_images ) : ### Generate a random seed for varied outputs seed = torch.randint ( 0, 1000000 , (1, ) ) .item () generator = torch.Generator ( device = " cpu " ) .manual_seed ( seed ) print (f "\n--- Generating Image {i + 1}/{num_images} (Seed: {seed}) ---" ) ### Run the pipeline without tracking gradients with torch.inference_mode () : image = pipeline ( prompt = prompt, negative_prompt = negative_prompt, num_inference_steps = num_inference_steps, guidance_scale = guidance_scale, generator = generator, cross_attention_kwargs = { " scale " : lora_scale}, ) .images[ 0 ] ### Save the output image file file_path = output_dir / f " face_{timestamp}_{i + 1:02d}.png " image.save(file_path ) print (f " -> Successfully saved: {file_path}" ) print (f "\n[COMPLETED] All {num_images} images are ready in '{output_dir}/'." ) Summary: This script iterates through your prompt with unique seeds, applies the LoRA weights at an optimal scaling factor, and saves the generated high-resolution portraits to your output folder.
The Result (Generated images after train sdxl lora ) The Complete Guide to Training SDXL LoRA on Your Own Face 20 The Complete Guide to Training SDXL LoRA on Your Own Face 21 The Complete Guide to Training SDXL LoRA on Your Own Face 22 FAQ
Can you actually train an SDXL LoRA on an 8GB GPU? Yes. By pre-encoding the prompt to unload the text encoders, pre-caching VAE latents into system RAM on the CPU, and using the 8-bit AdamW optimizer with gradient checkpointing, peak VRAM stays around 6.5–7.2 GB.
Why do we use 768×768 resolution instead of SDXL’s native 1024×1024? Training at 768×768 significantly reduces activation sizes and memory demands during backpropagation. The resulting weights still produce high-quality 1024×1024 images during inference.
How many images are needed to train a likeness LoRA? Generally, 15 to 25 diverse, high-quality images are ideal. A mix of close-up portraits, medium shots, and varied expressions gives the model enough information without risk of early overfitting.
Why do we train with a batch size of 1 and gradient accumulation? An 8GB GPU cannot hold more than one SDXL latent batch in memory during backward passes. Setting train_batch_size=1 and gradient_accumulation_steps=2 allows you to effectively train with an effective batch size of 2 while keeping memory low.
Why do we use a unique trigger word like ‘ohwx man’? A unique, rare token like ‘ohwx’ prevents the model from overwriting its existing concept of a person. Appending a class word like ‘man’ or ‘woman’ anchors the subject to the model’s existing facial priors.
Why do we enable VAE tiling during inference? The SDXL VAE requires a large memory allocation to decode 1024×1024 latents back into RGB pixel space. VAE tiling breaks the latent image into overlapping tiles, decoding them sequentially to prevent out-of-memory errors.
What is the benefit of the DPM-Solver++ scheduler? DPMSolverMultistepScheduler with Karras sigmas is a fast second-order solver. It converges on high-quality images in 25 to 30 steps, roughly half the steps needed by older schedulers like DDIM or Euler.
Can I use this same pipeline to train objects or artistic styles? Yes, the exact same pipeline works for objects and styles. You simply swap your image dataset and adjust the prompt from a person-centric description to your target object or style token.
Why do we need the PYTORCH_CUDA_ALLOC_CONF environment variable? It controls how PyTorch allocates cached GPU memory, reducing fragmentation. The garbage_collection_threshold:0.8 setting forces memory reclamation before memory allocations fail.
Where can I use the resulting pytorch_lora_weights.safetensors file? Because it is exported in the standard Diffusers format, it can be loaded directly into Python scripts, ComfyUI workflows, or converted for use in popular web interfaces like Automatic1111 or Forge.
Pushing the Limits of Local AI This pipeline proves that creating custom, high-fidelity generative models is not exclusive to users with massive hardware budgets. By understanding how the architecture works beneath the hood, you can implement targeted optimizations—like aggressive pre-caching, 8-bit quantization, and gradient checkpointing—that make train SDXL LoRA workflows a reality on standard 8GB GPUs.
Taking ownership of this process in Python removes the dependency on black-box WebUIs and paid subscription services. You control the data, you understand the memory limits, and the final .safetensors file is yours to deploy anywhere.
Connect : ☕ Buy me a coffee — https://ko-fi.com/eranfeit
🖥️ Email : feitgemel@gmail.com
🌐 https://eranfeit.net
🤝 Fiverr : https://www.fiverr.com/s/mB3Pbb
Enjoy,
Eran
 Skip to content